
Hi! I’ve been gone for a long time. Last time I posted I was whining about not having a job, then I got one and left you guys hanging. I’m sorry for that. That was bad blogger behavior. So, the job was great, I got to travel (a lot!), but now that job is over and I’m on the hunt again. My travels taught me or maybe I should say brought out a new side to my beauty routine and I’ll share them with you in the next few post.
So being on the road all the time was a challenge for me, make-up wise. I am a person who decides on the fly what I’m going to do with my make-up in the morning. Hence the conversations I have with my mirror about how I feel that day. When I first started traveling I was taking way too much make-up with me and I was getting up crazy early to try to figure out what I was going to do. This got old real quick and I realized a couple things. One, waking up extra early when you combating jetlag is going to ruin any look you create. Two, hotel room lighting sucks 99% of the time. So while it may look good in the mirror, it does not read well under flourescent lighting. This lead me to the look I’m going to wear here. I didn’t have to pack half my vanity, to change it up I just needed to change my lipstick, and it allowed me to look polished and put together in front of an audience. Once I stuck to this look my mornings got so much easier and I could do this look in my sleep (which I may have done on a few Eastcoast trips!)
I hope you guys enjoy this look, post comments below if you have any questions, and tell me/show me your go to work looks!
xo
em
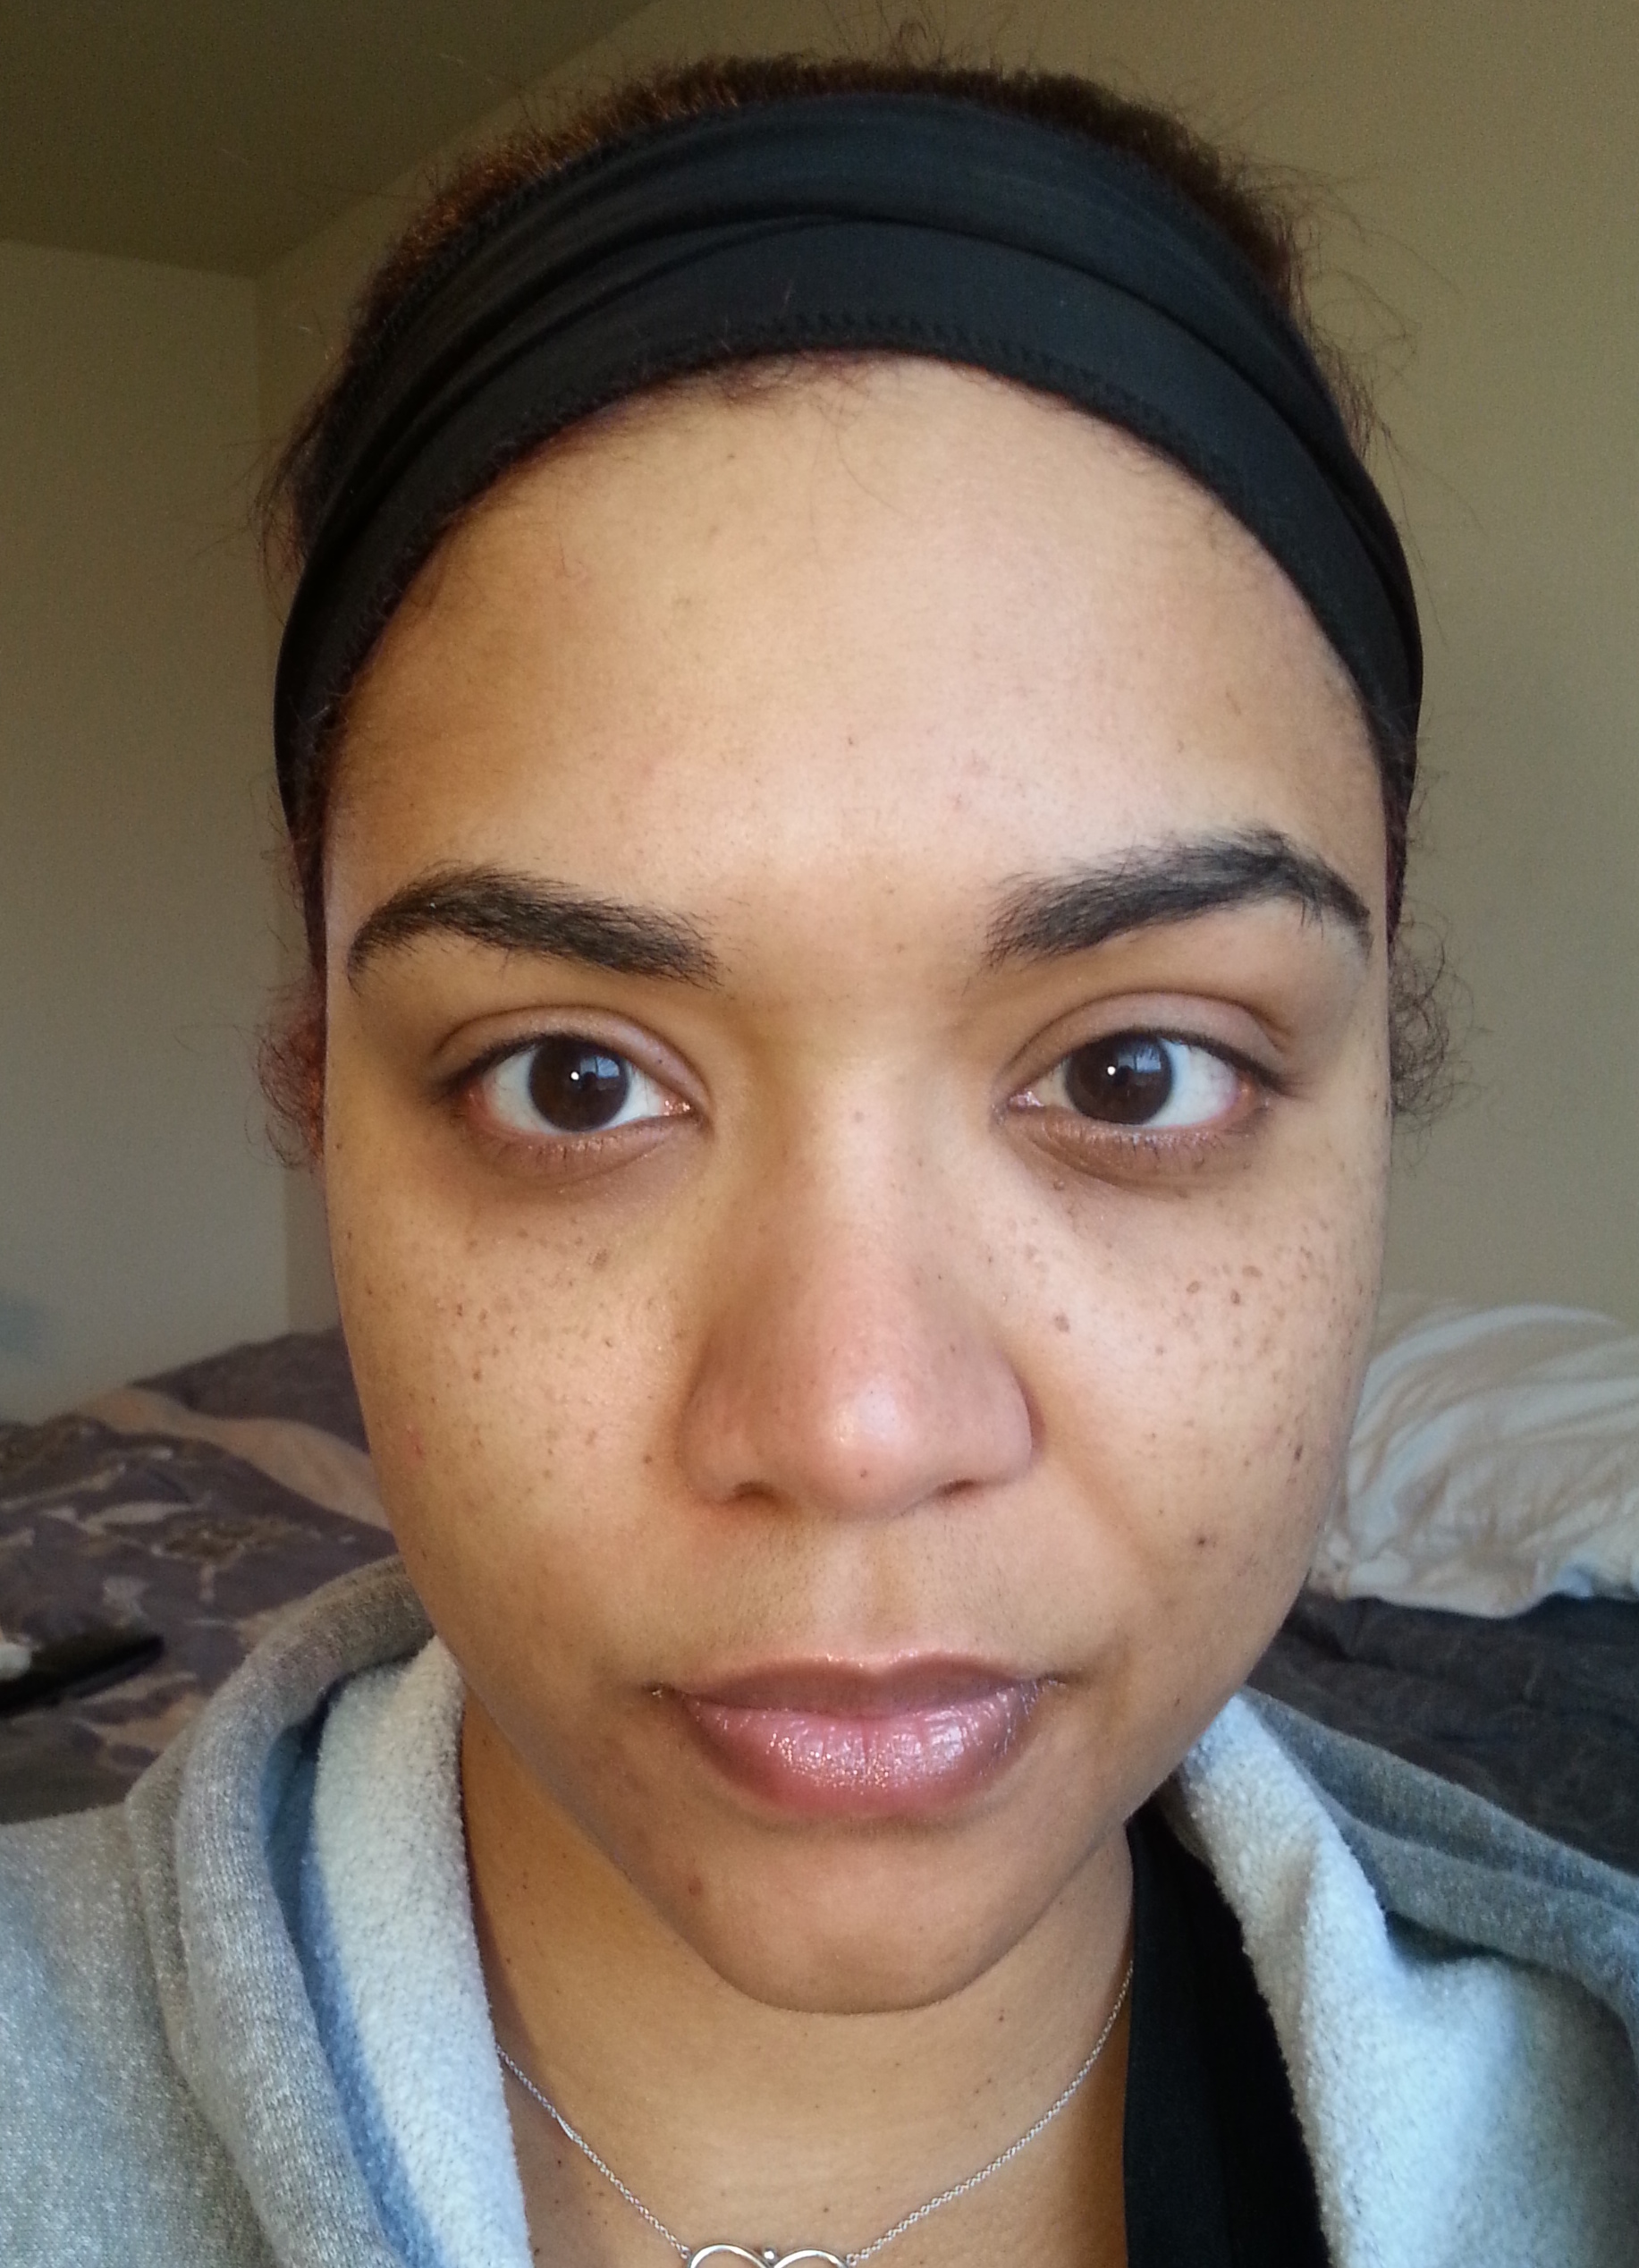
Start with a clean moisturized face!
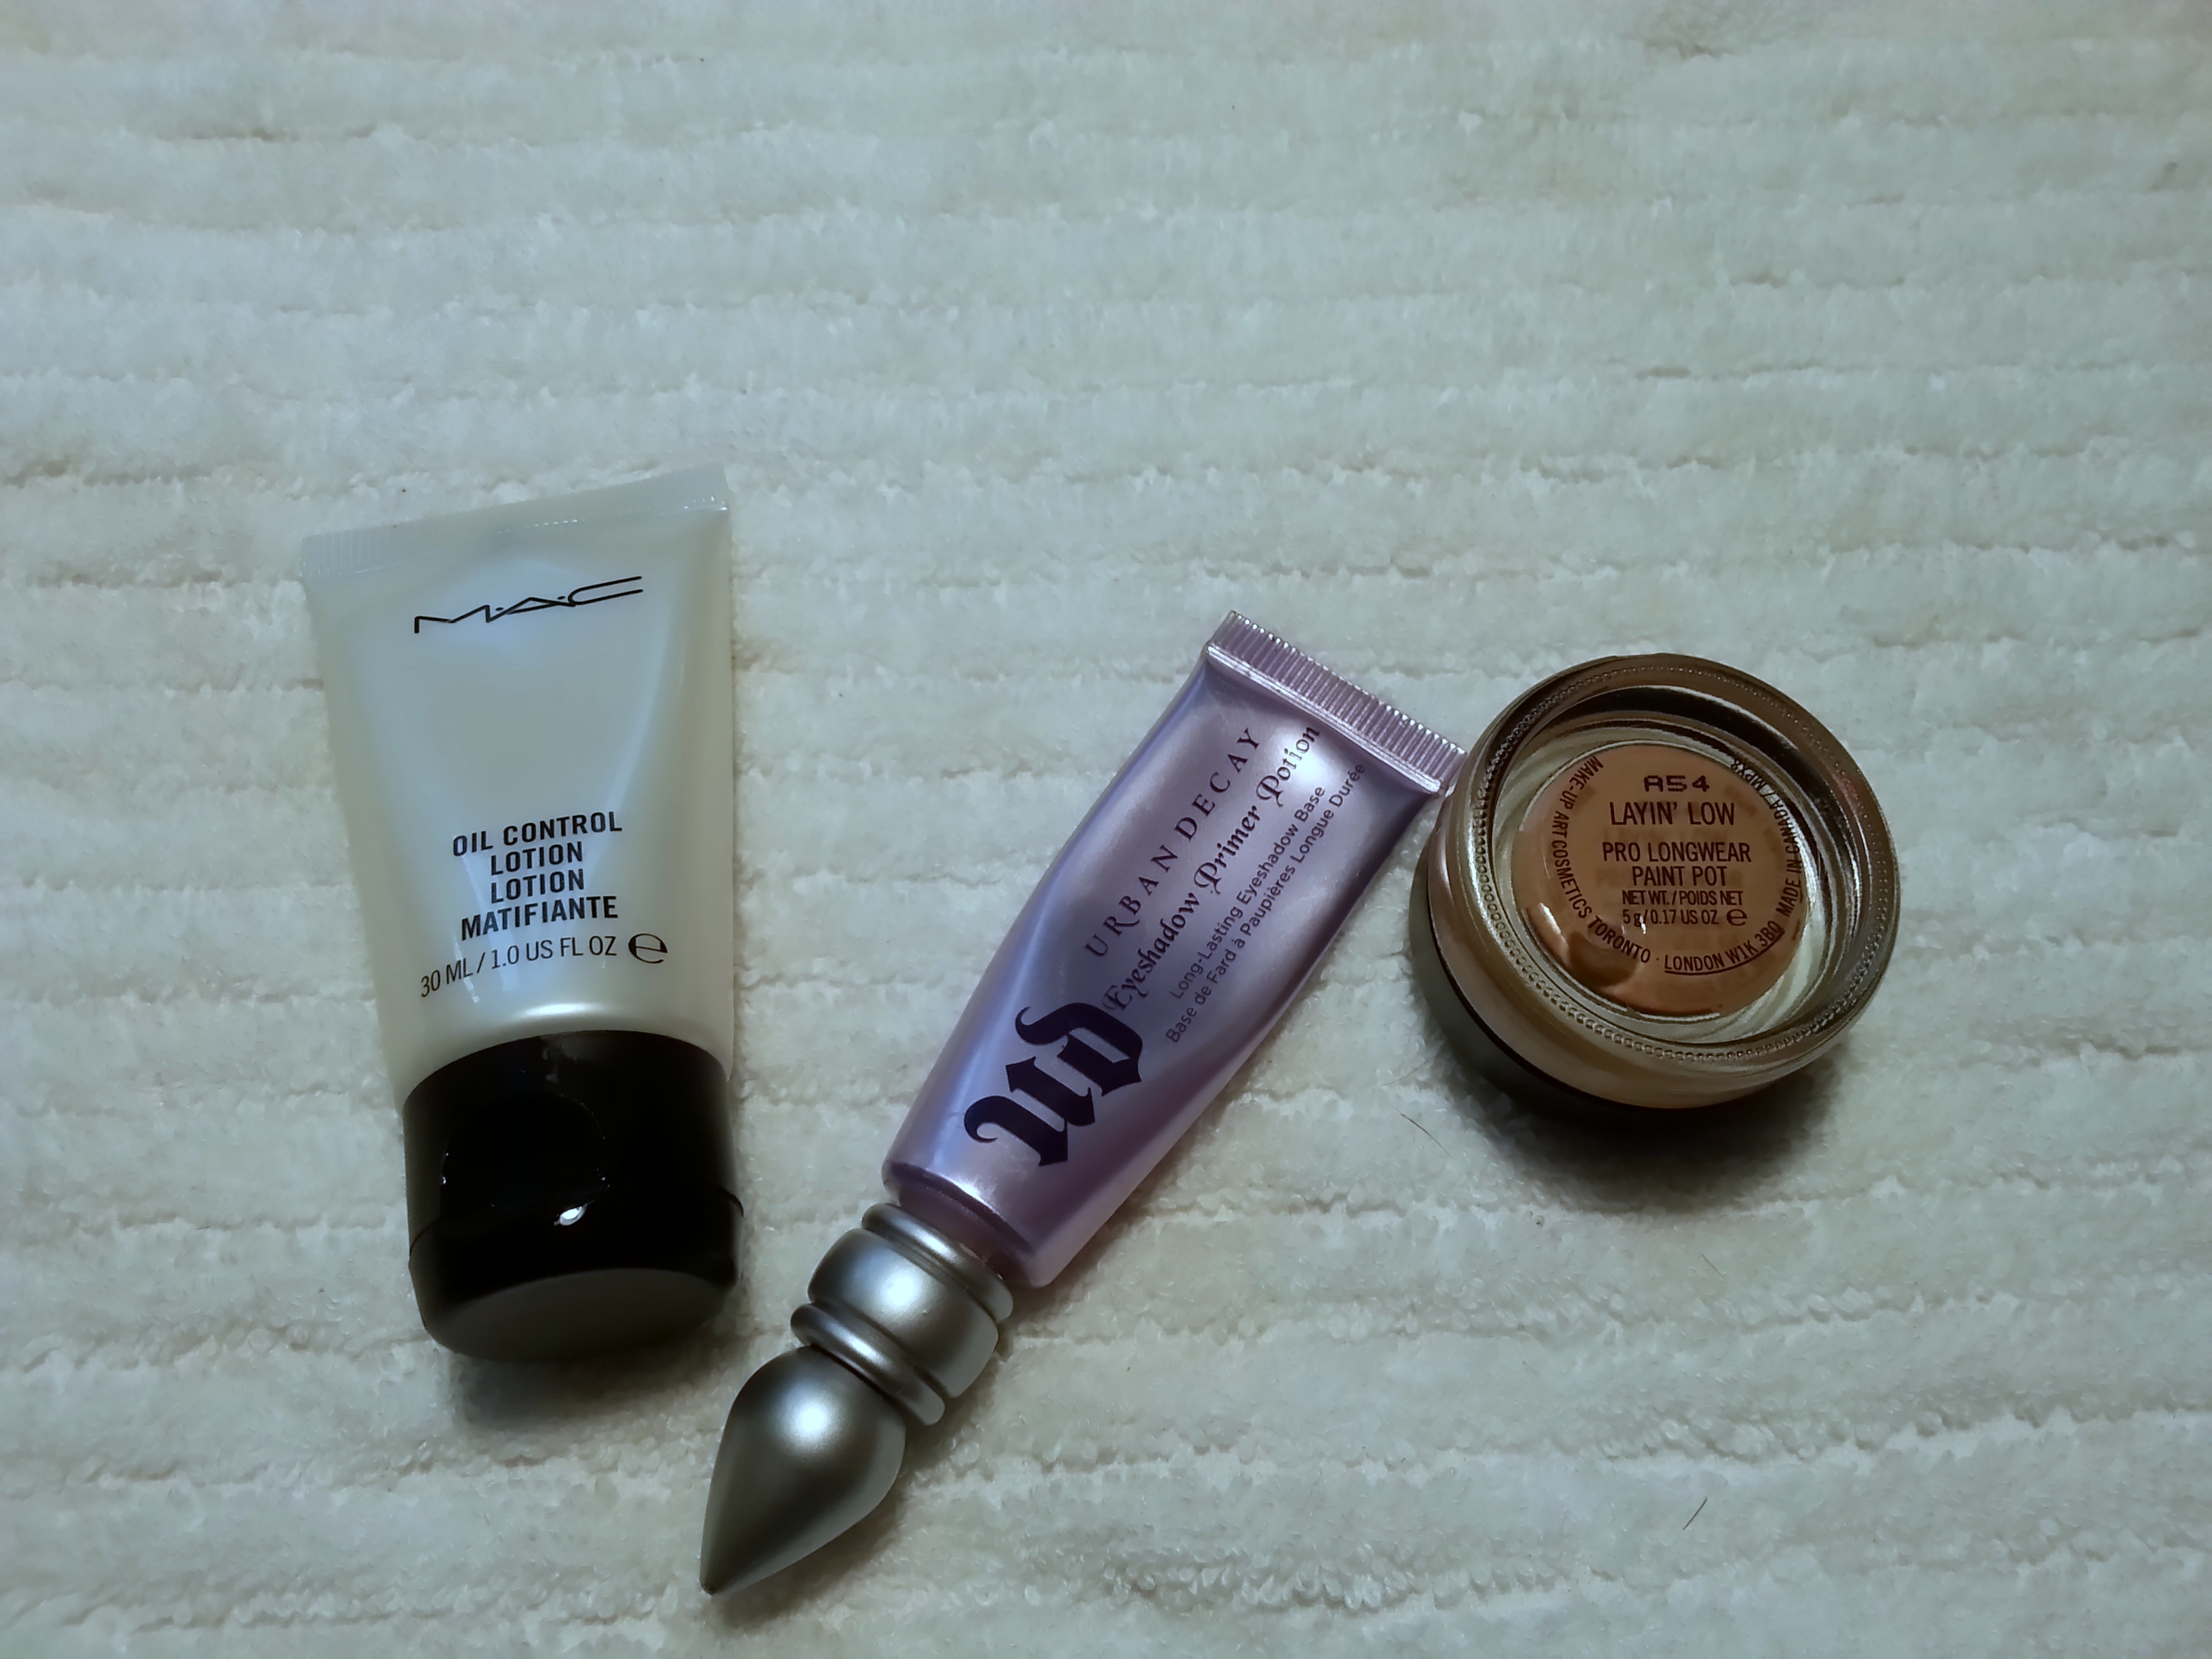
I’ve primed my lids with Urban Decay’s Original Primer Potion and MAC’s Paint Pot in Layin’ Low. Then using my MAC 217 brush I applied MAC’s Saddle in my crease and slightly above, blening out well.

Using the same brush, I then blend MAC’s Swiss Chocolate about half way into the crease towards the inner corner.
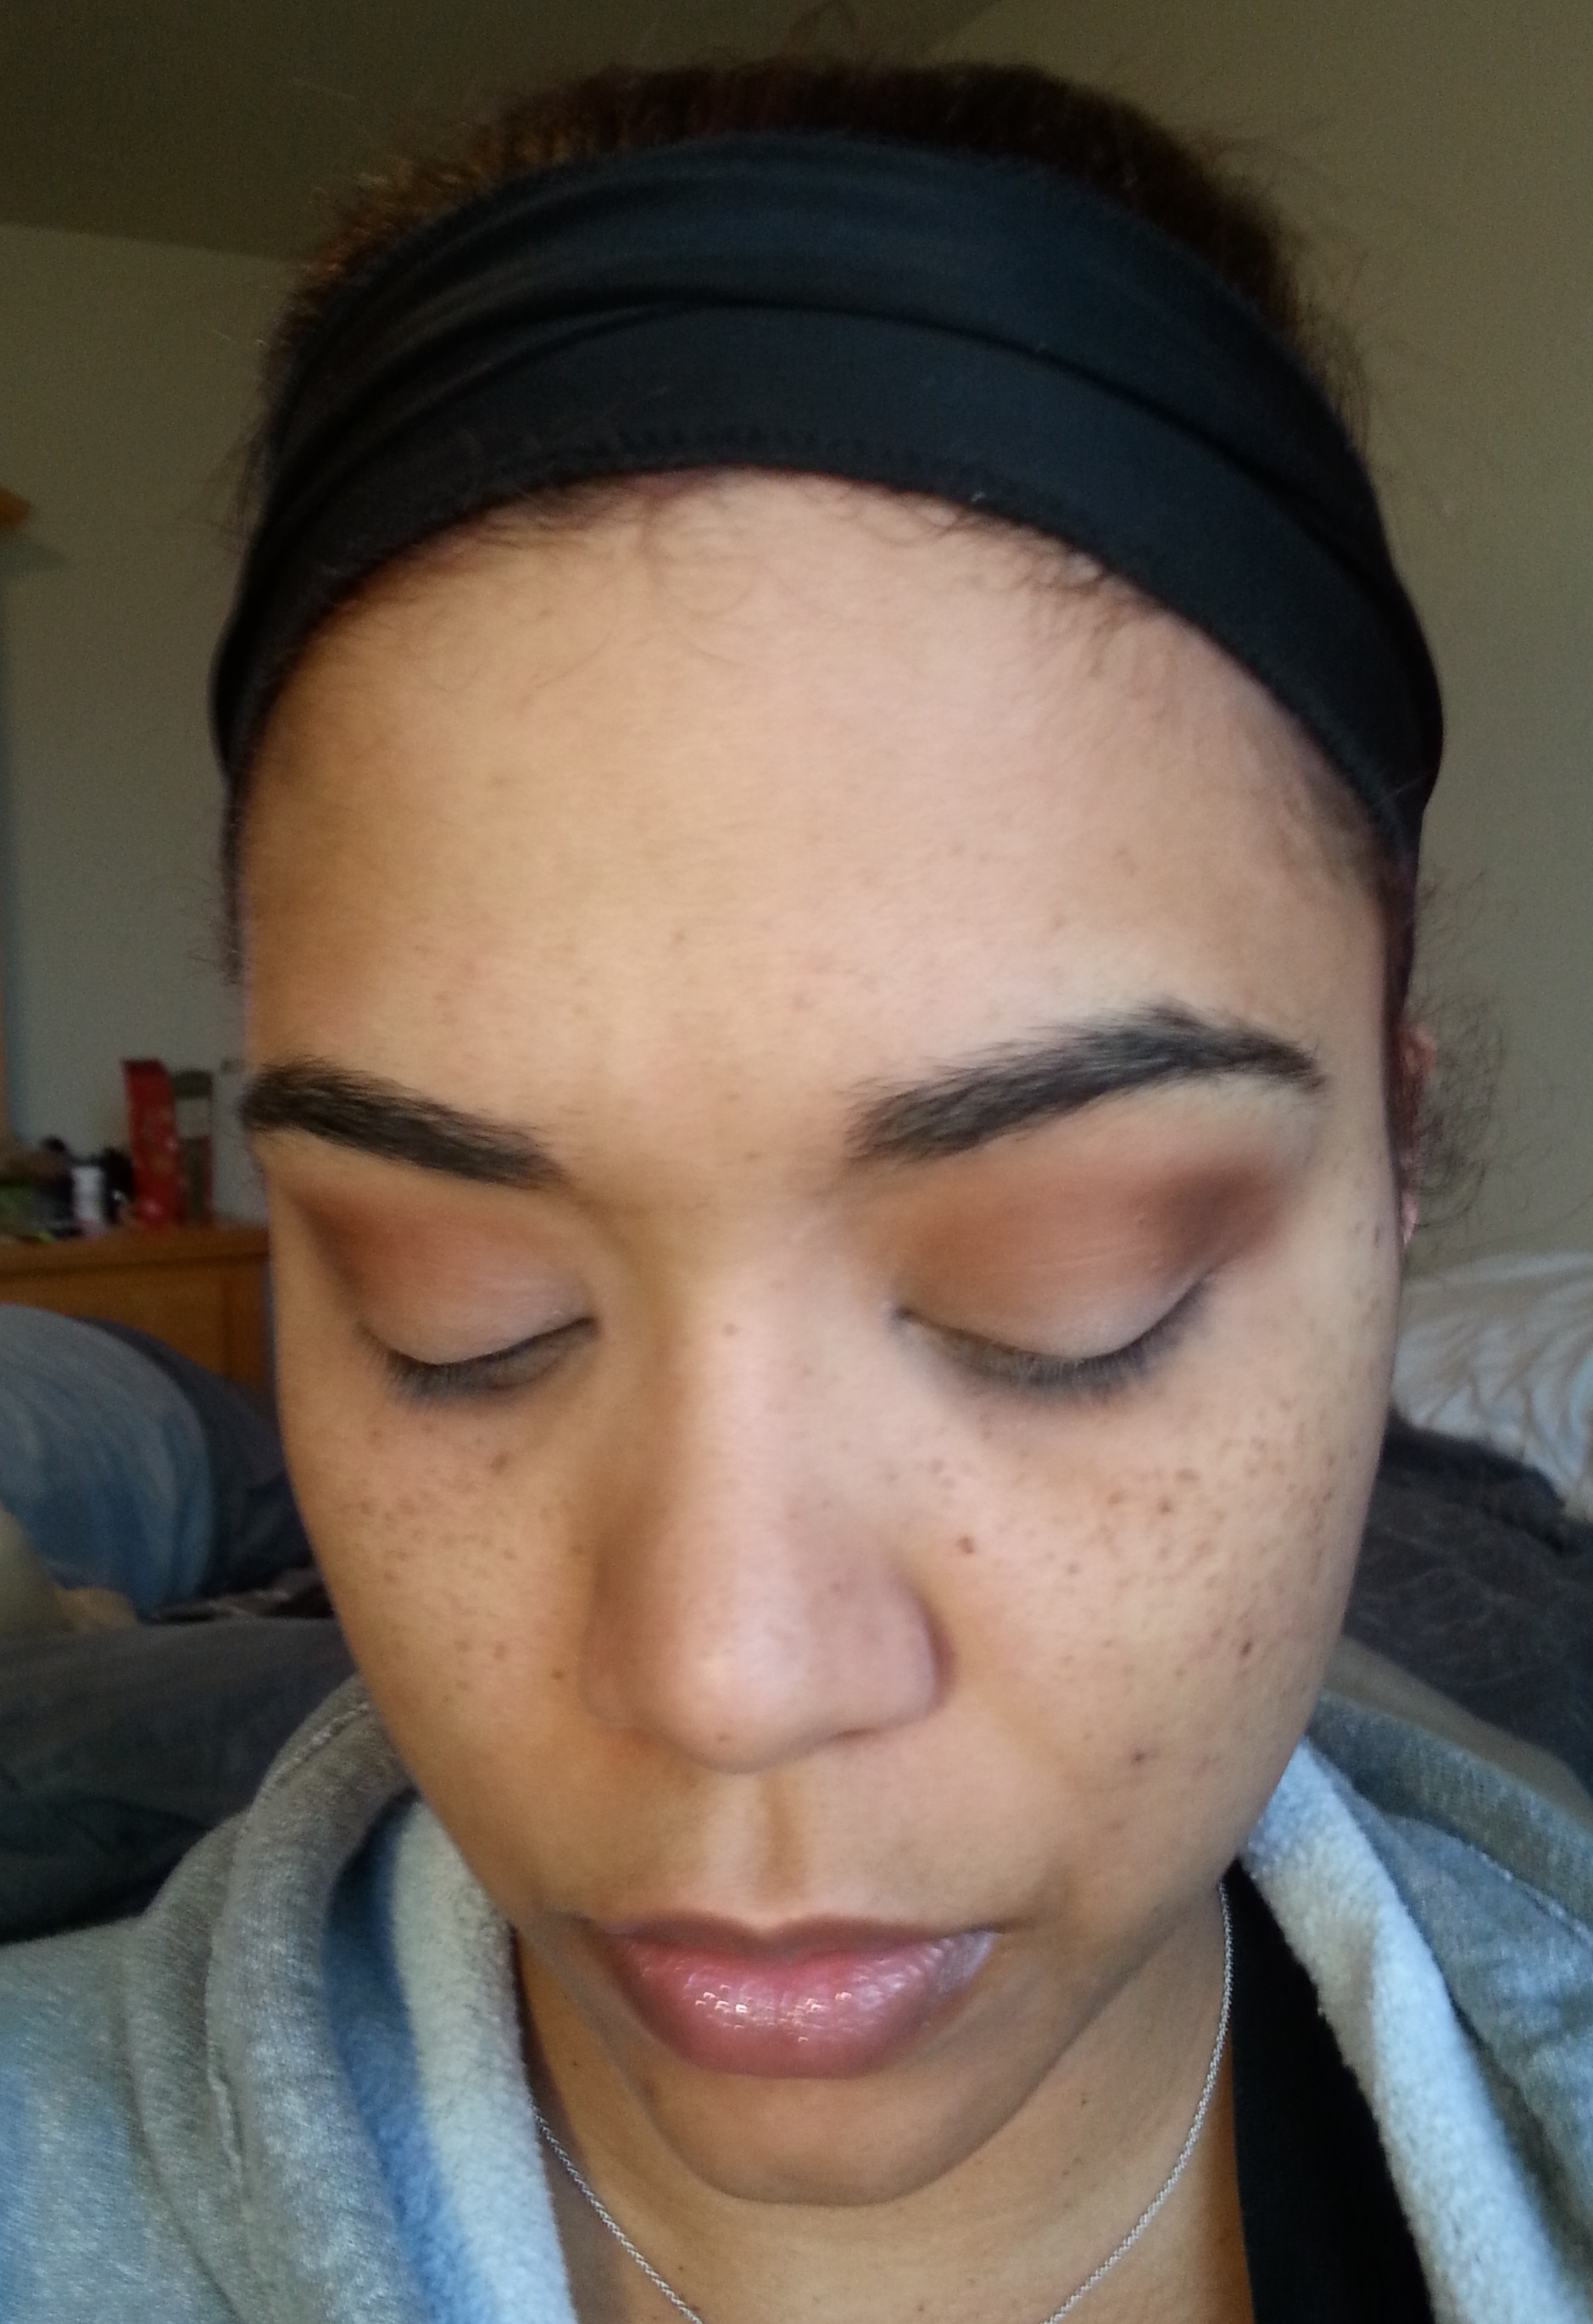

Then using a domed blending brush, I blend Handwritten into my crease, depositing the majority of the color on the outer corner.
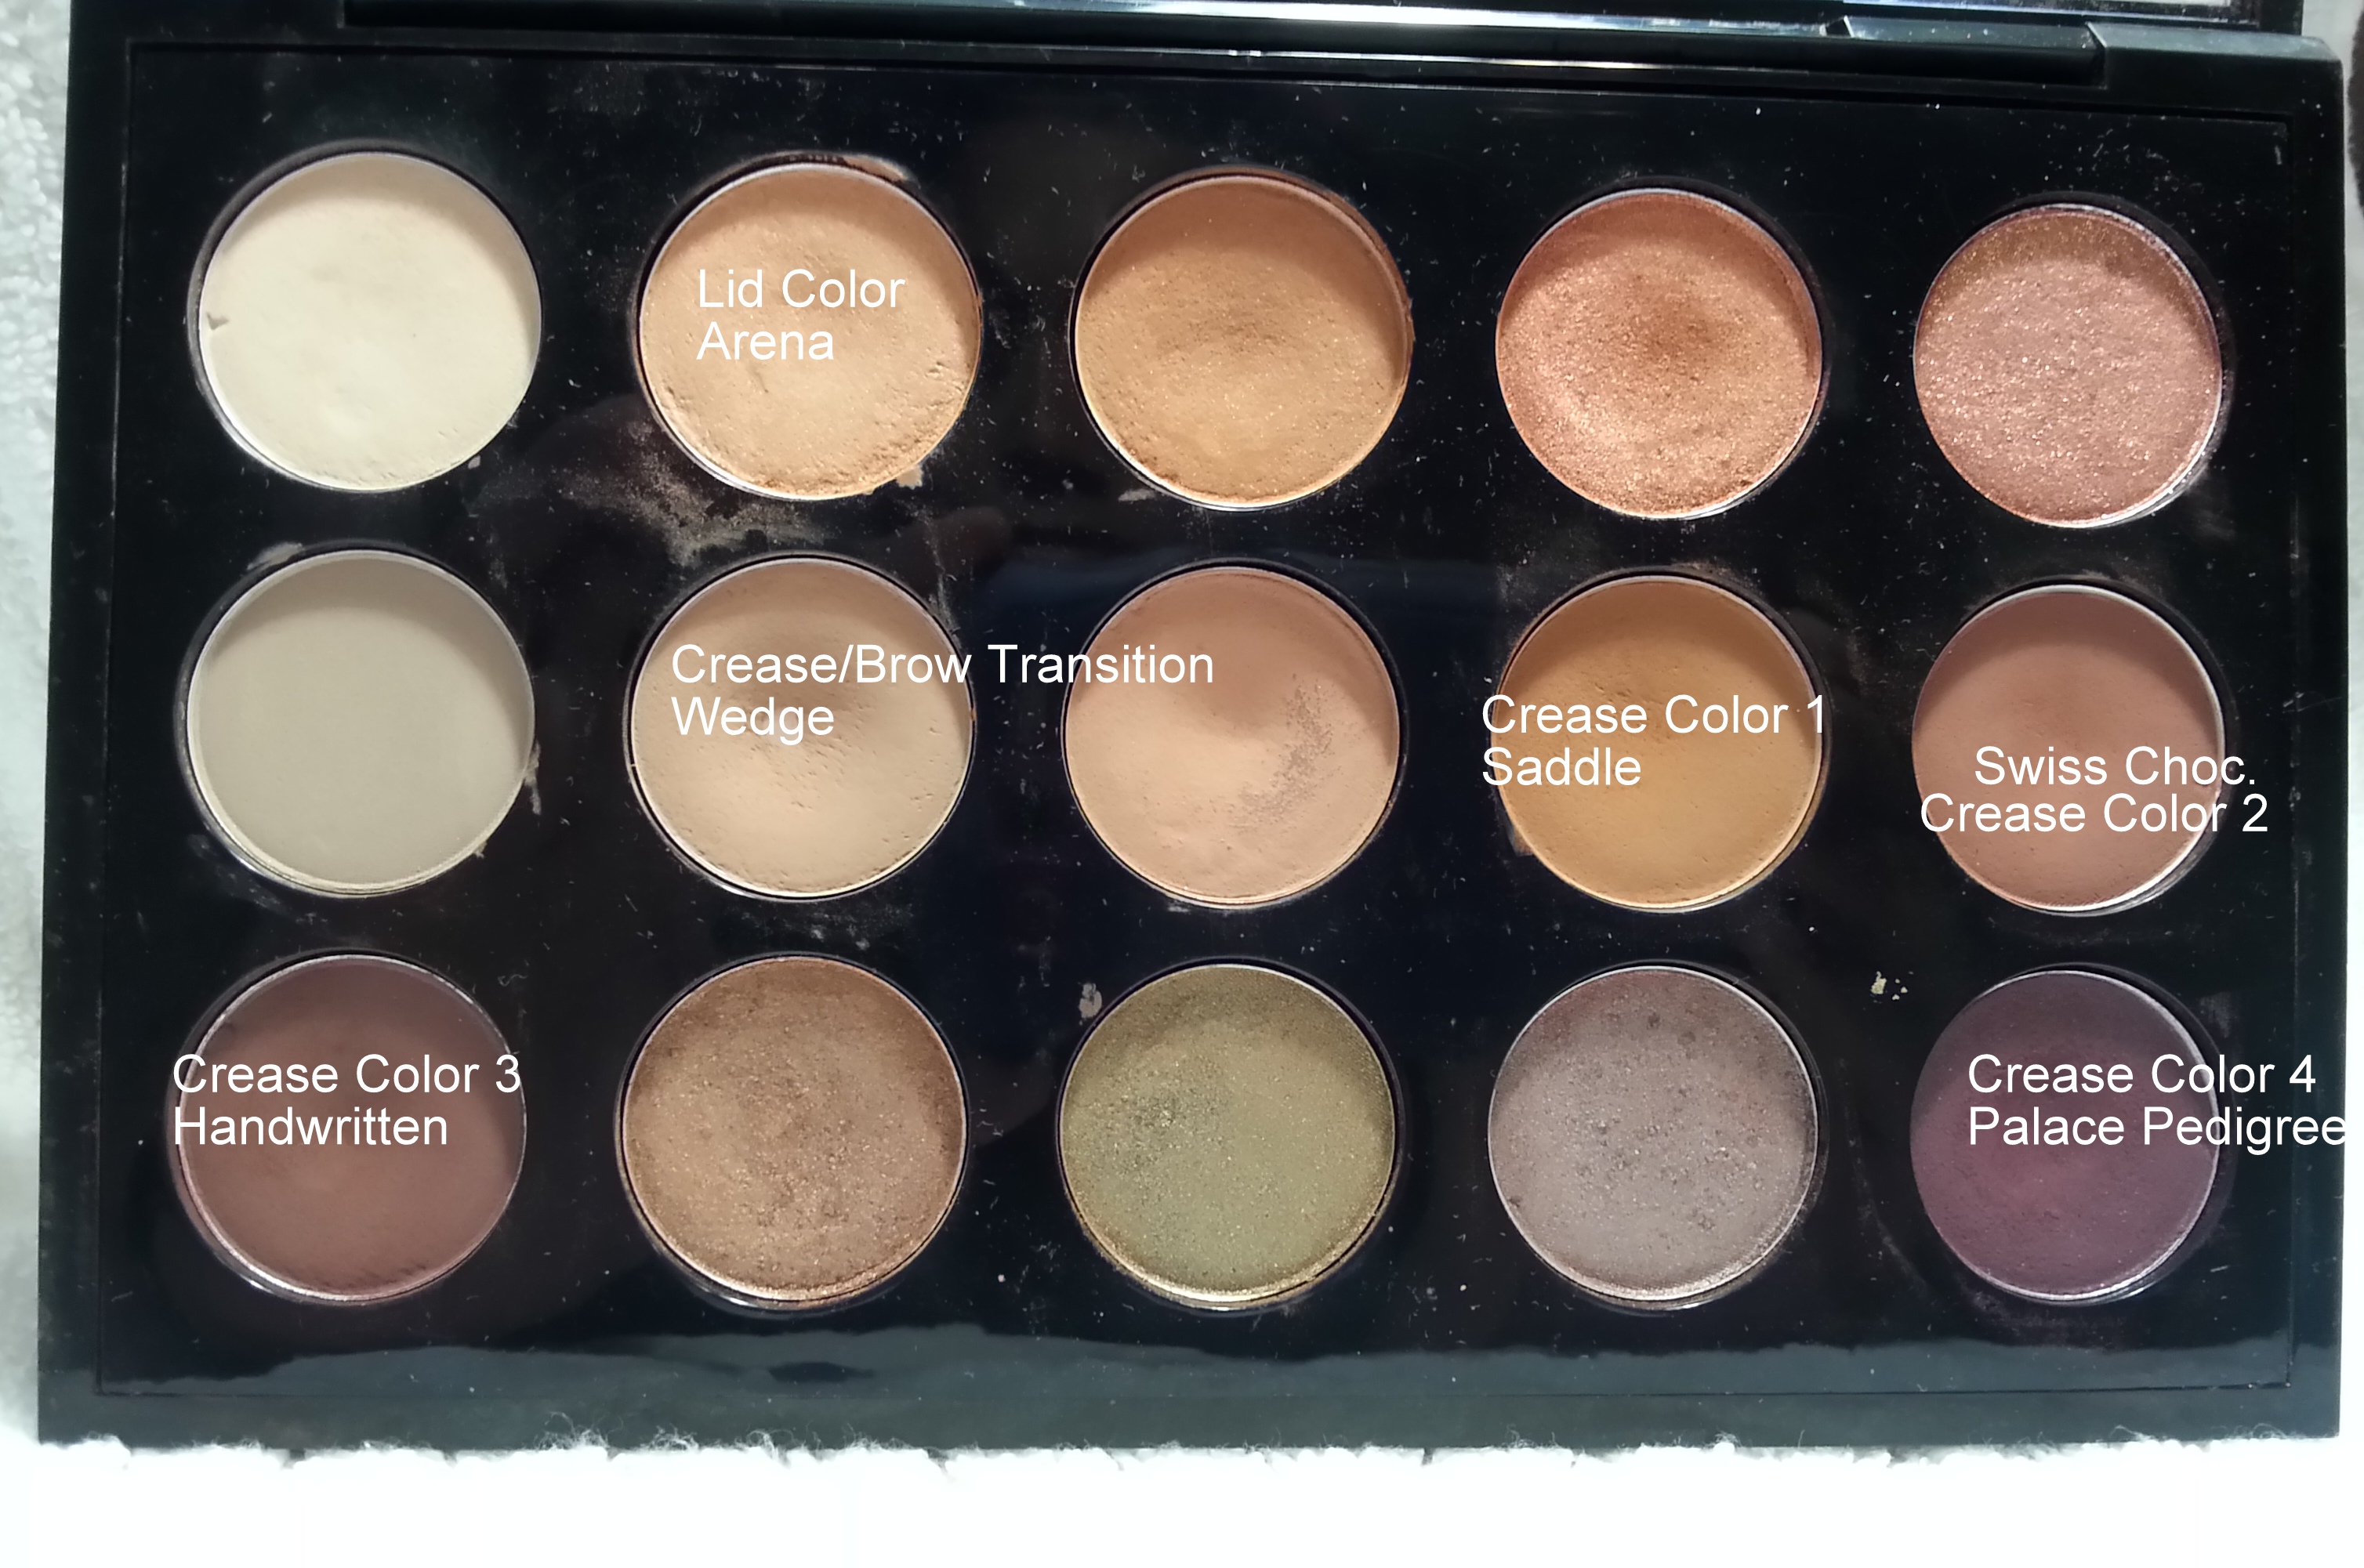
Using an angled blending brush, I applied MAC’s Palace Pedigree lightly to the outer corner of my eye for extra depth. Then I used a soft shadow brush to apply MAC’s Arena all over the lid. The photo below also shows how I start my winged liner.

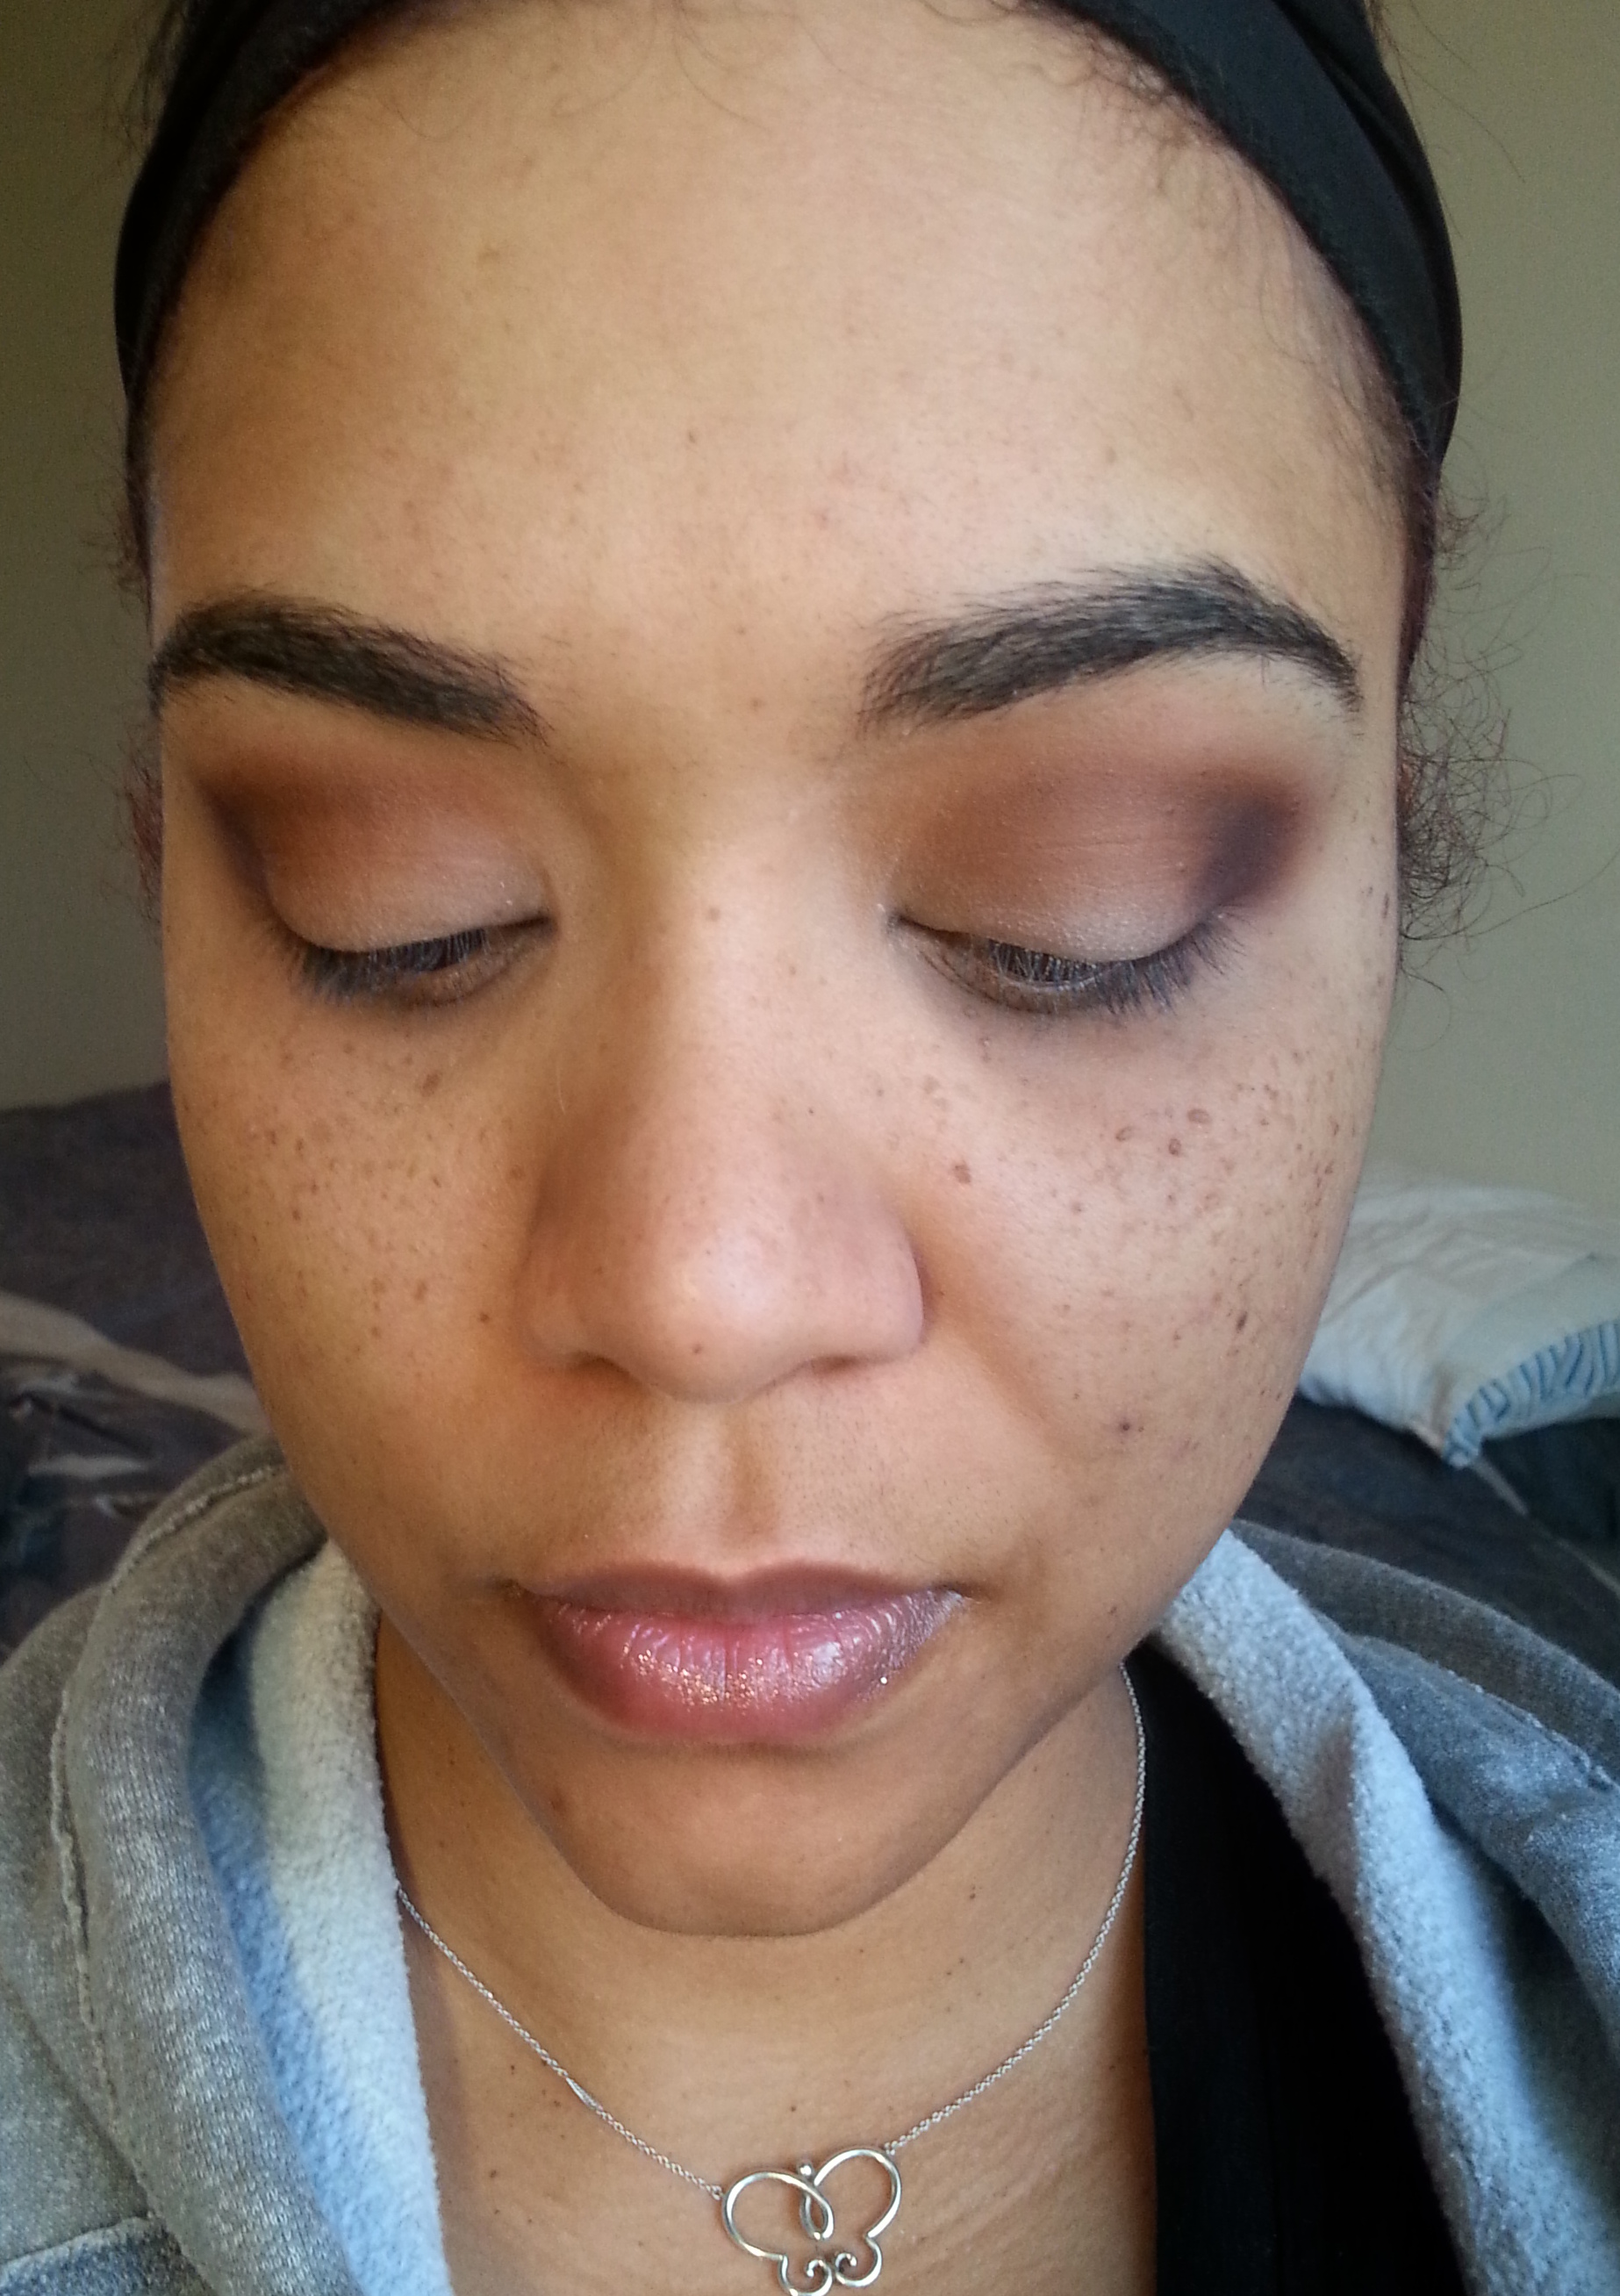
To finish it up, I used MAC’s Wedge to blend out the shadows in the outer edge of the crease. I wanted to show how I do my winged liner step-by-step, but the photos didn’t come out well.


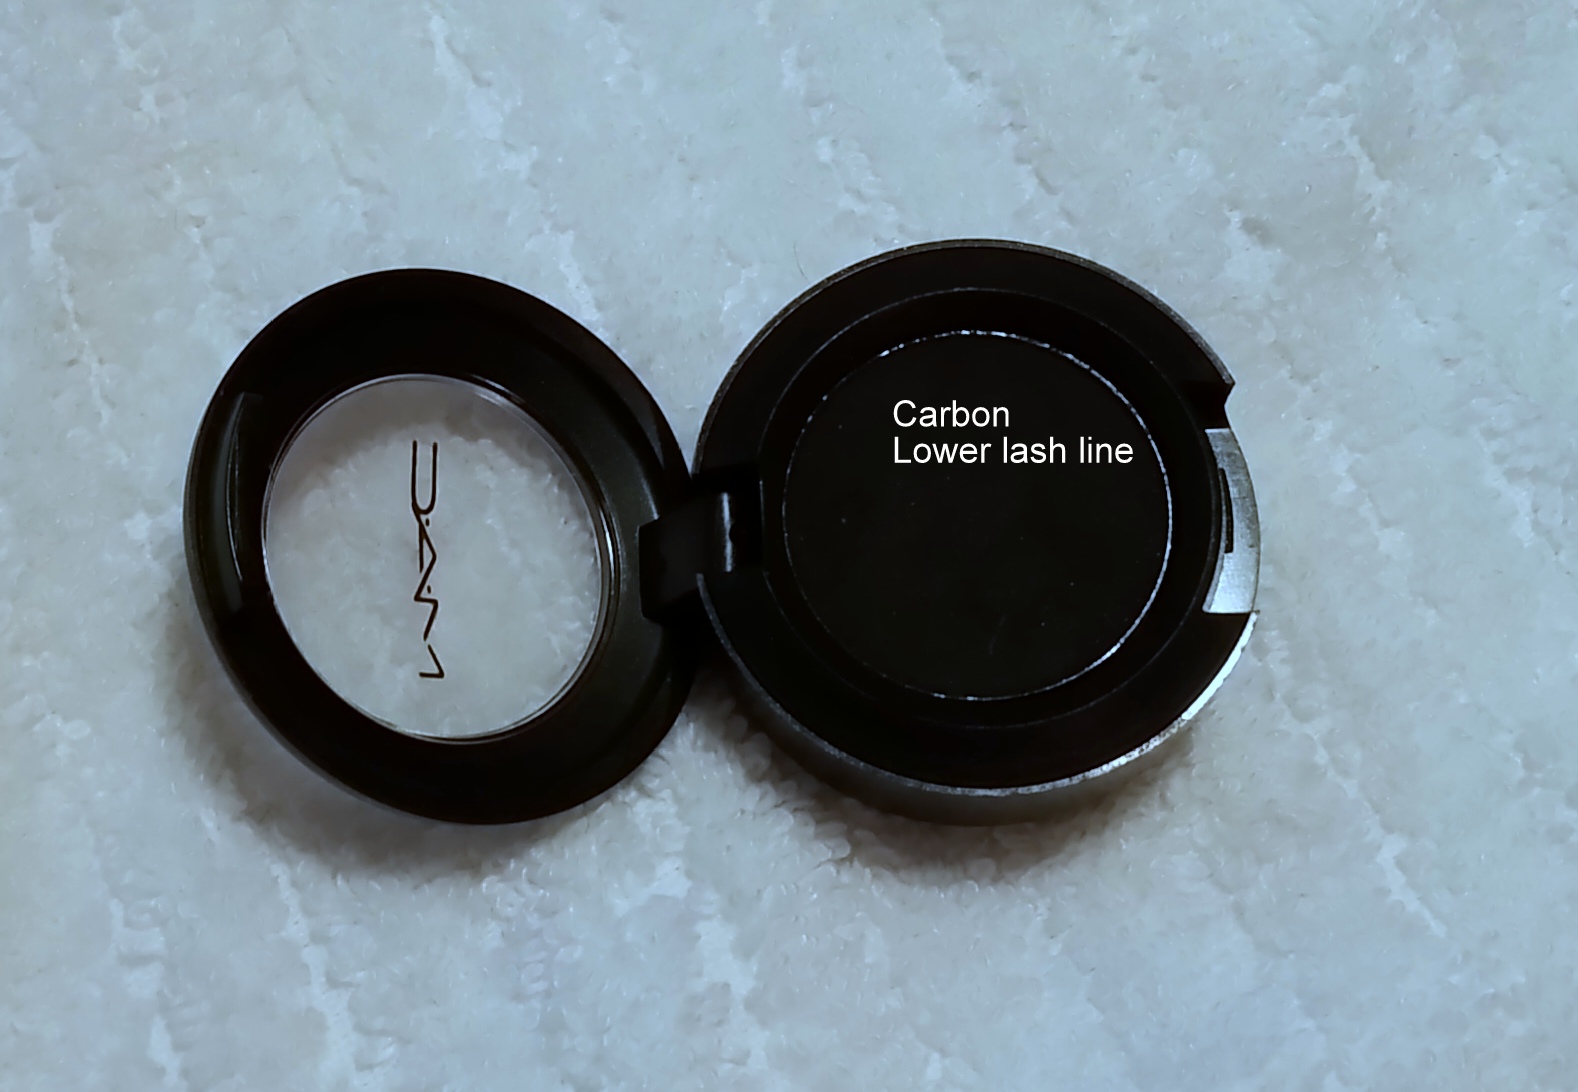
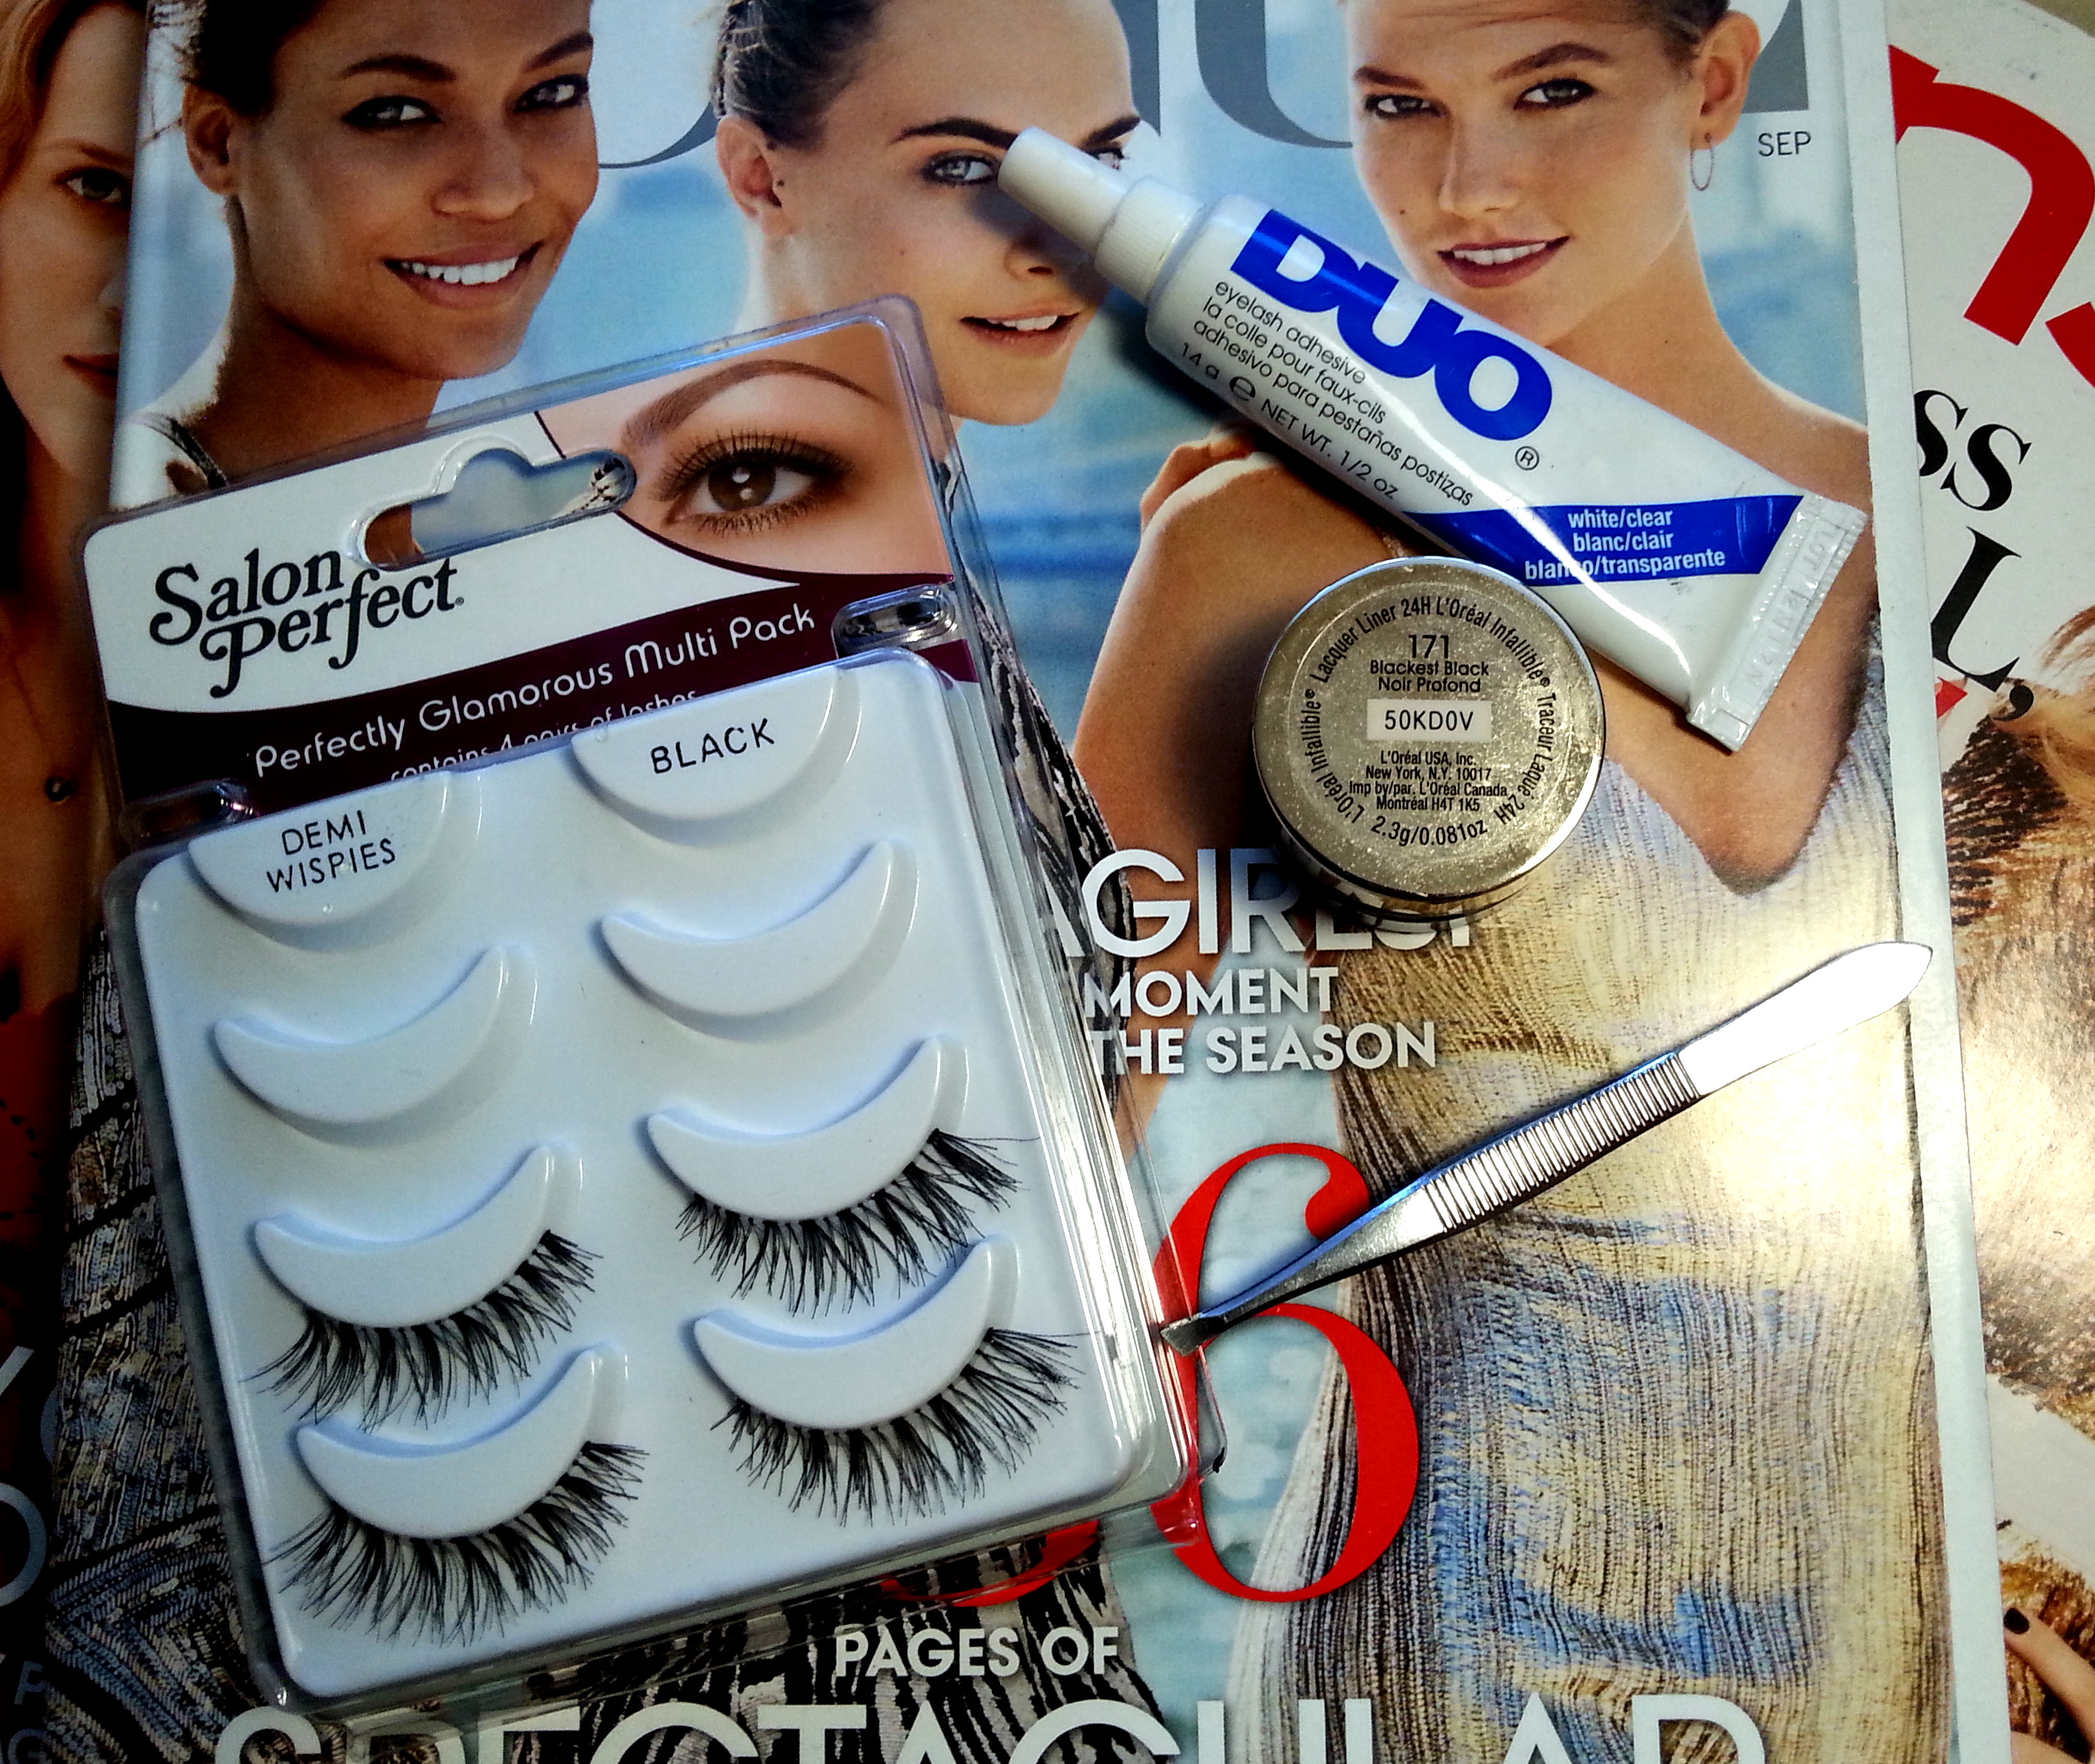
To finish up the eyes. I applied Salon Perfect Demi Wispies and used the same shadows on my lids to line my lower lash line. I used Saddle along the entire lash line, Swiss Chocolate 2/3 along the lash line, Handwritten half way along the lash line, Palace Pedigree and Carbon are smuged 1/4 of the way in. On my waterline I used Rimmel’s Scandalized eyeliner in nude. My brows are kinda unruly right now, I’m letting them grow back in so I just brushed them and filled the sparse areas in slightly with MAC’s Stud brow pencil.


Next I applied my concealer and foundation. I’m using MAC Pro Longwear and Laura Mercier Smooth Finish Flawless Fluid foundation. I apply both of these using my Beauty Blender sponges. I use MAC’s Fix+ to dampen my sponge before I apply my concealer. For the Laura Mercier foundation I use a dry sponge. Then I set it with my MAC MSF in Deep.

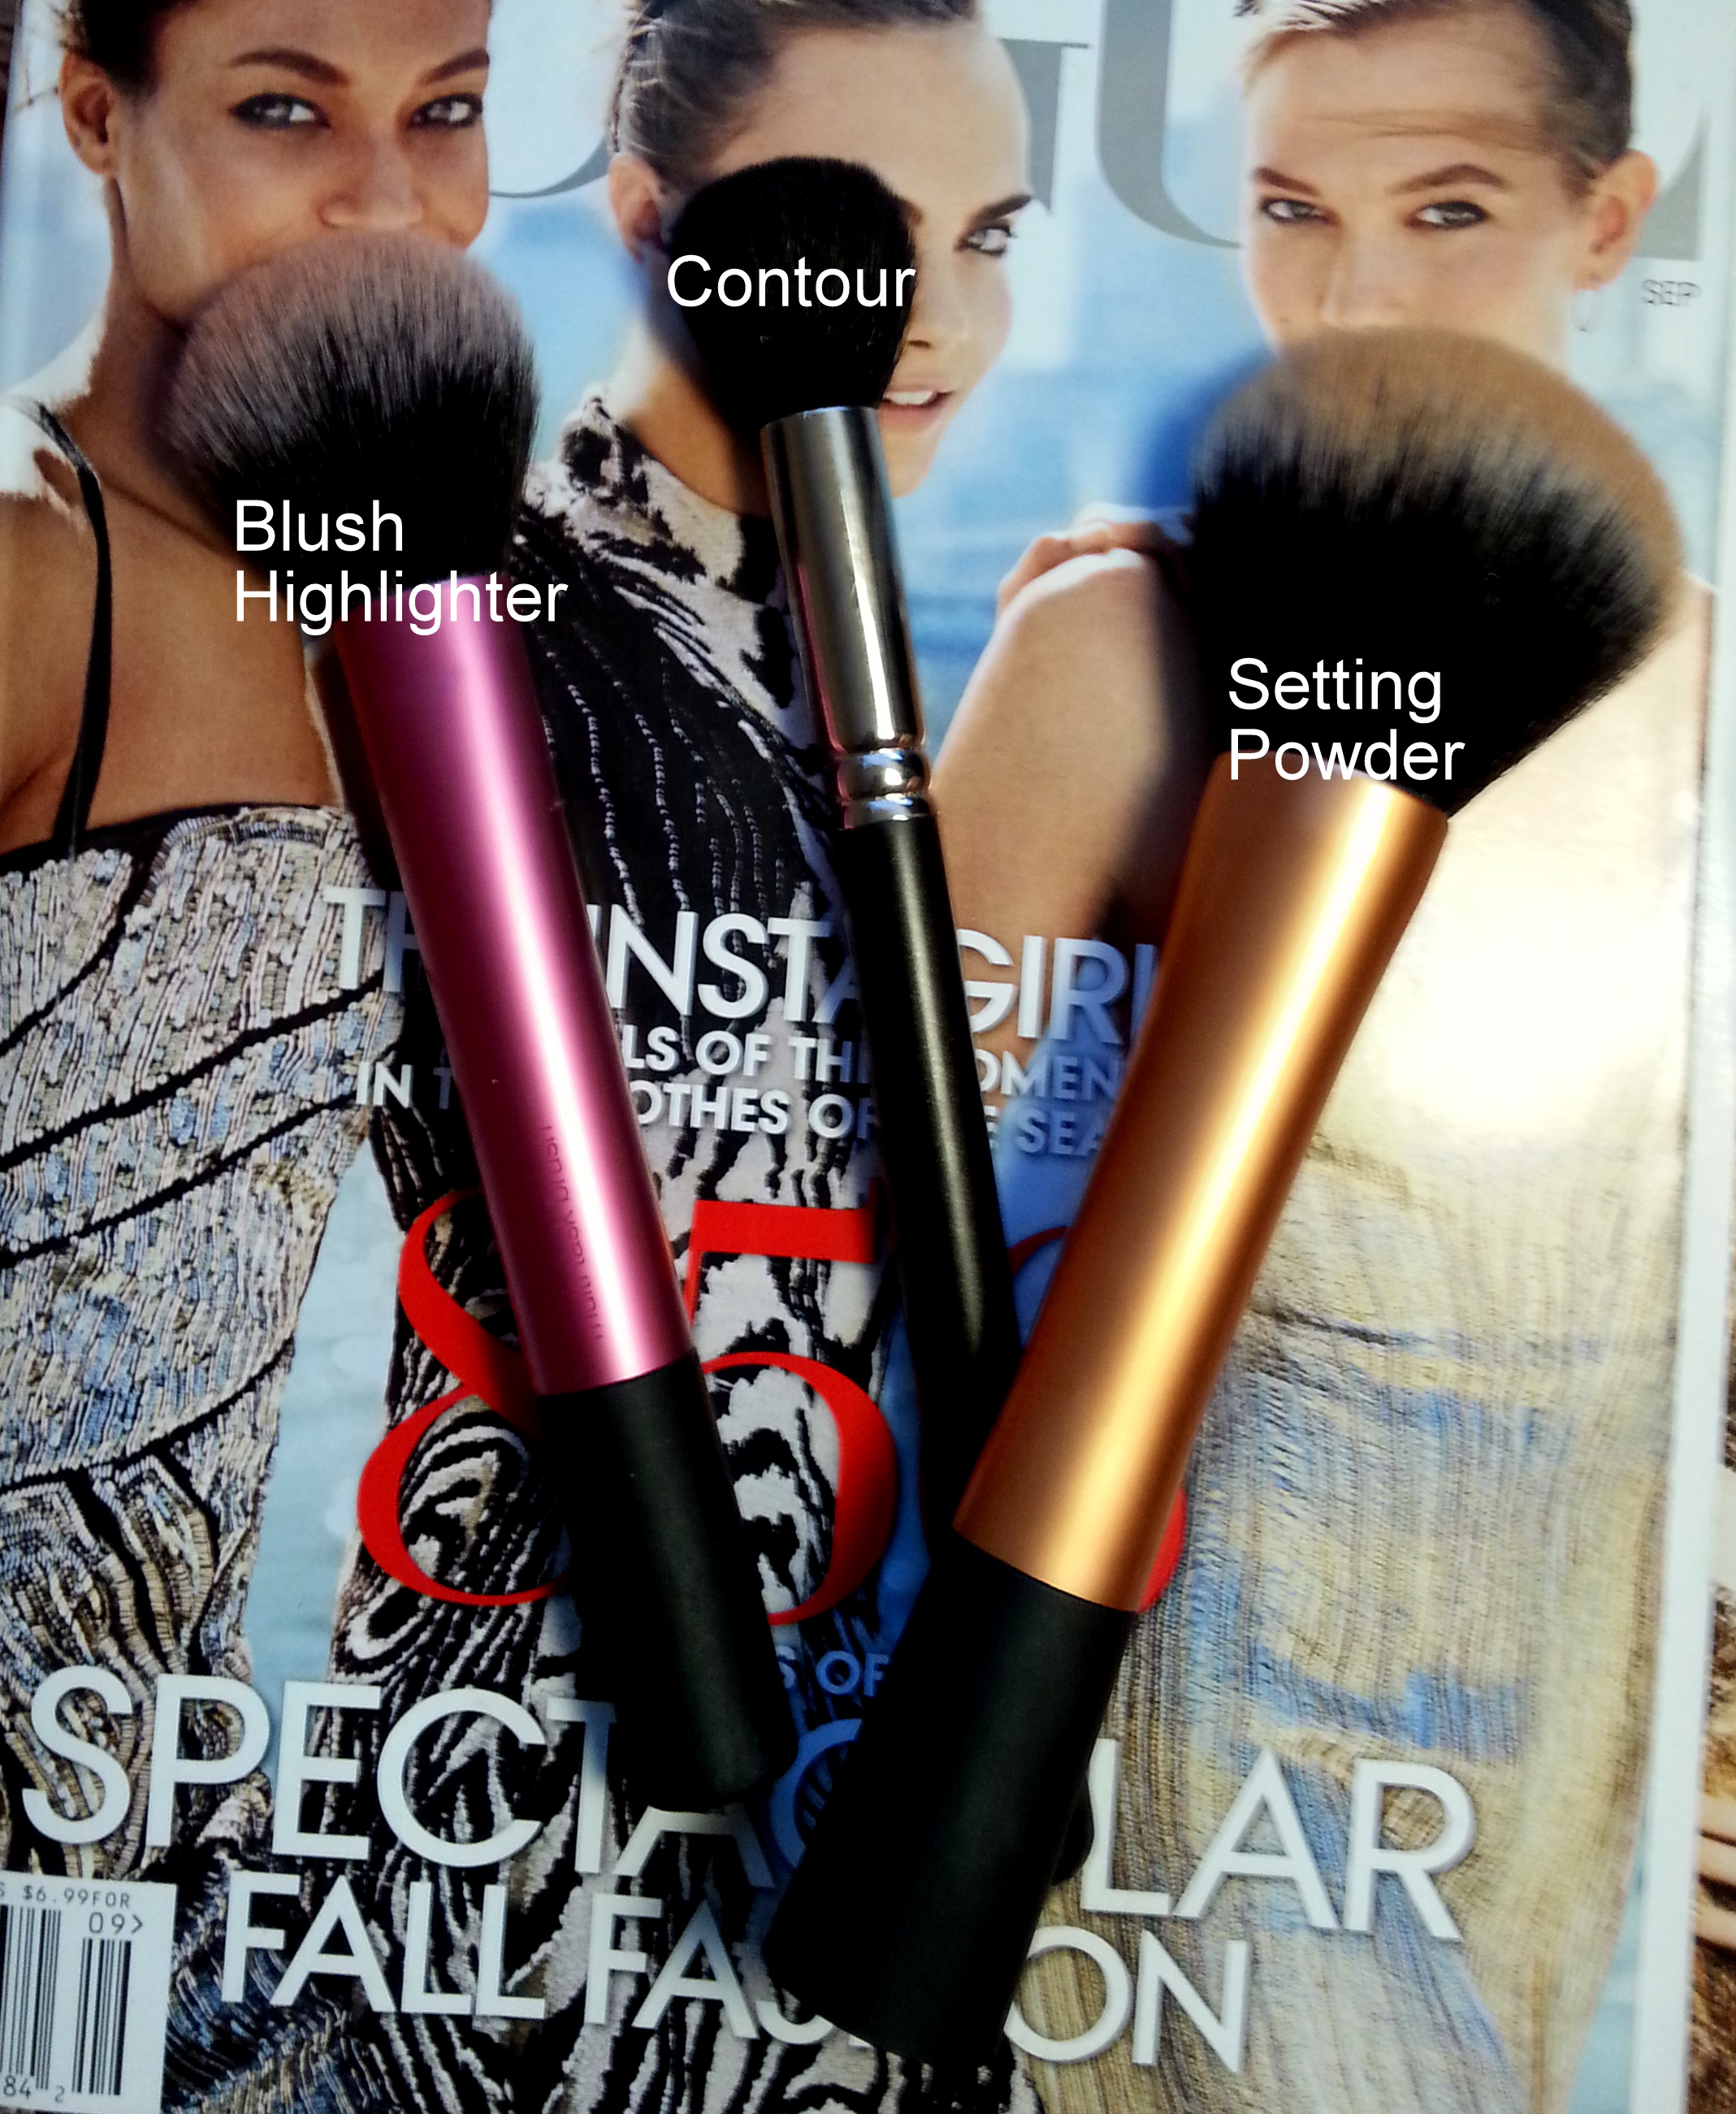


To finish my face I used MAC’s Blunt blush as contour, Melba for my blush and Estee Lauder’s 5 tone Shimmer Powder in Bronze Shimmer as my highlight.


The great thing I like about this look is being able to change it up by changing my lipstick.
Natural Nude: (All MAC)
I lined my lips with Spice liner, and filled them in with Brave, and then lightly over lined them with Cork.


Pale Nude:
I line my lips with Spice liner from MAC, and then fill them in with Coquette from Lime Crime. So it’s not so harsh and to give it a little of an ombre effect I go back over the outer edge of my lips with Spice again.


This is the same lip, but I just added MAC’s Myth Lipglass.


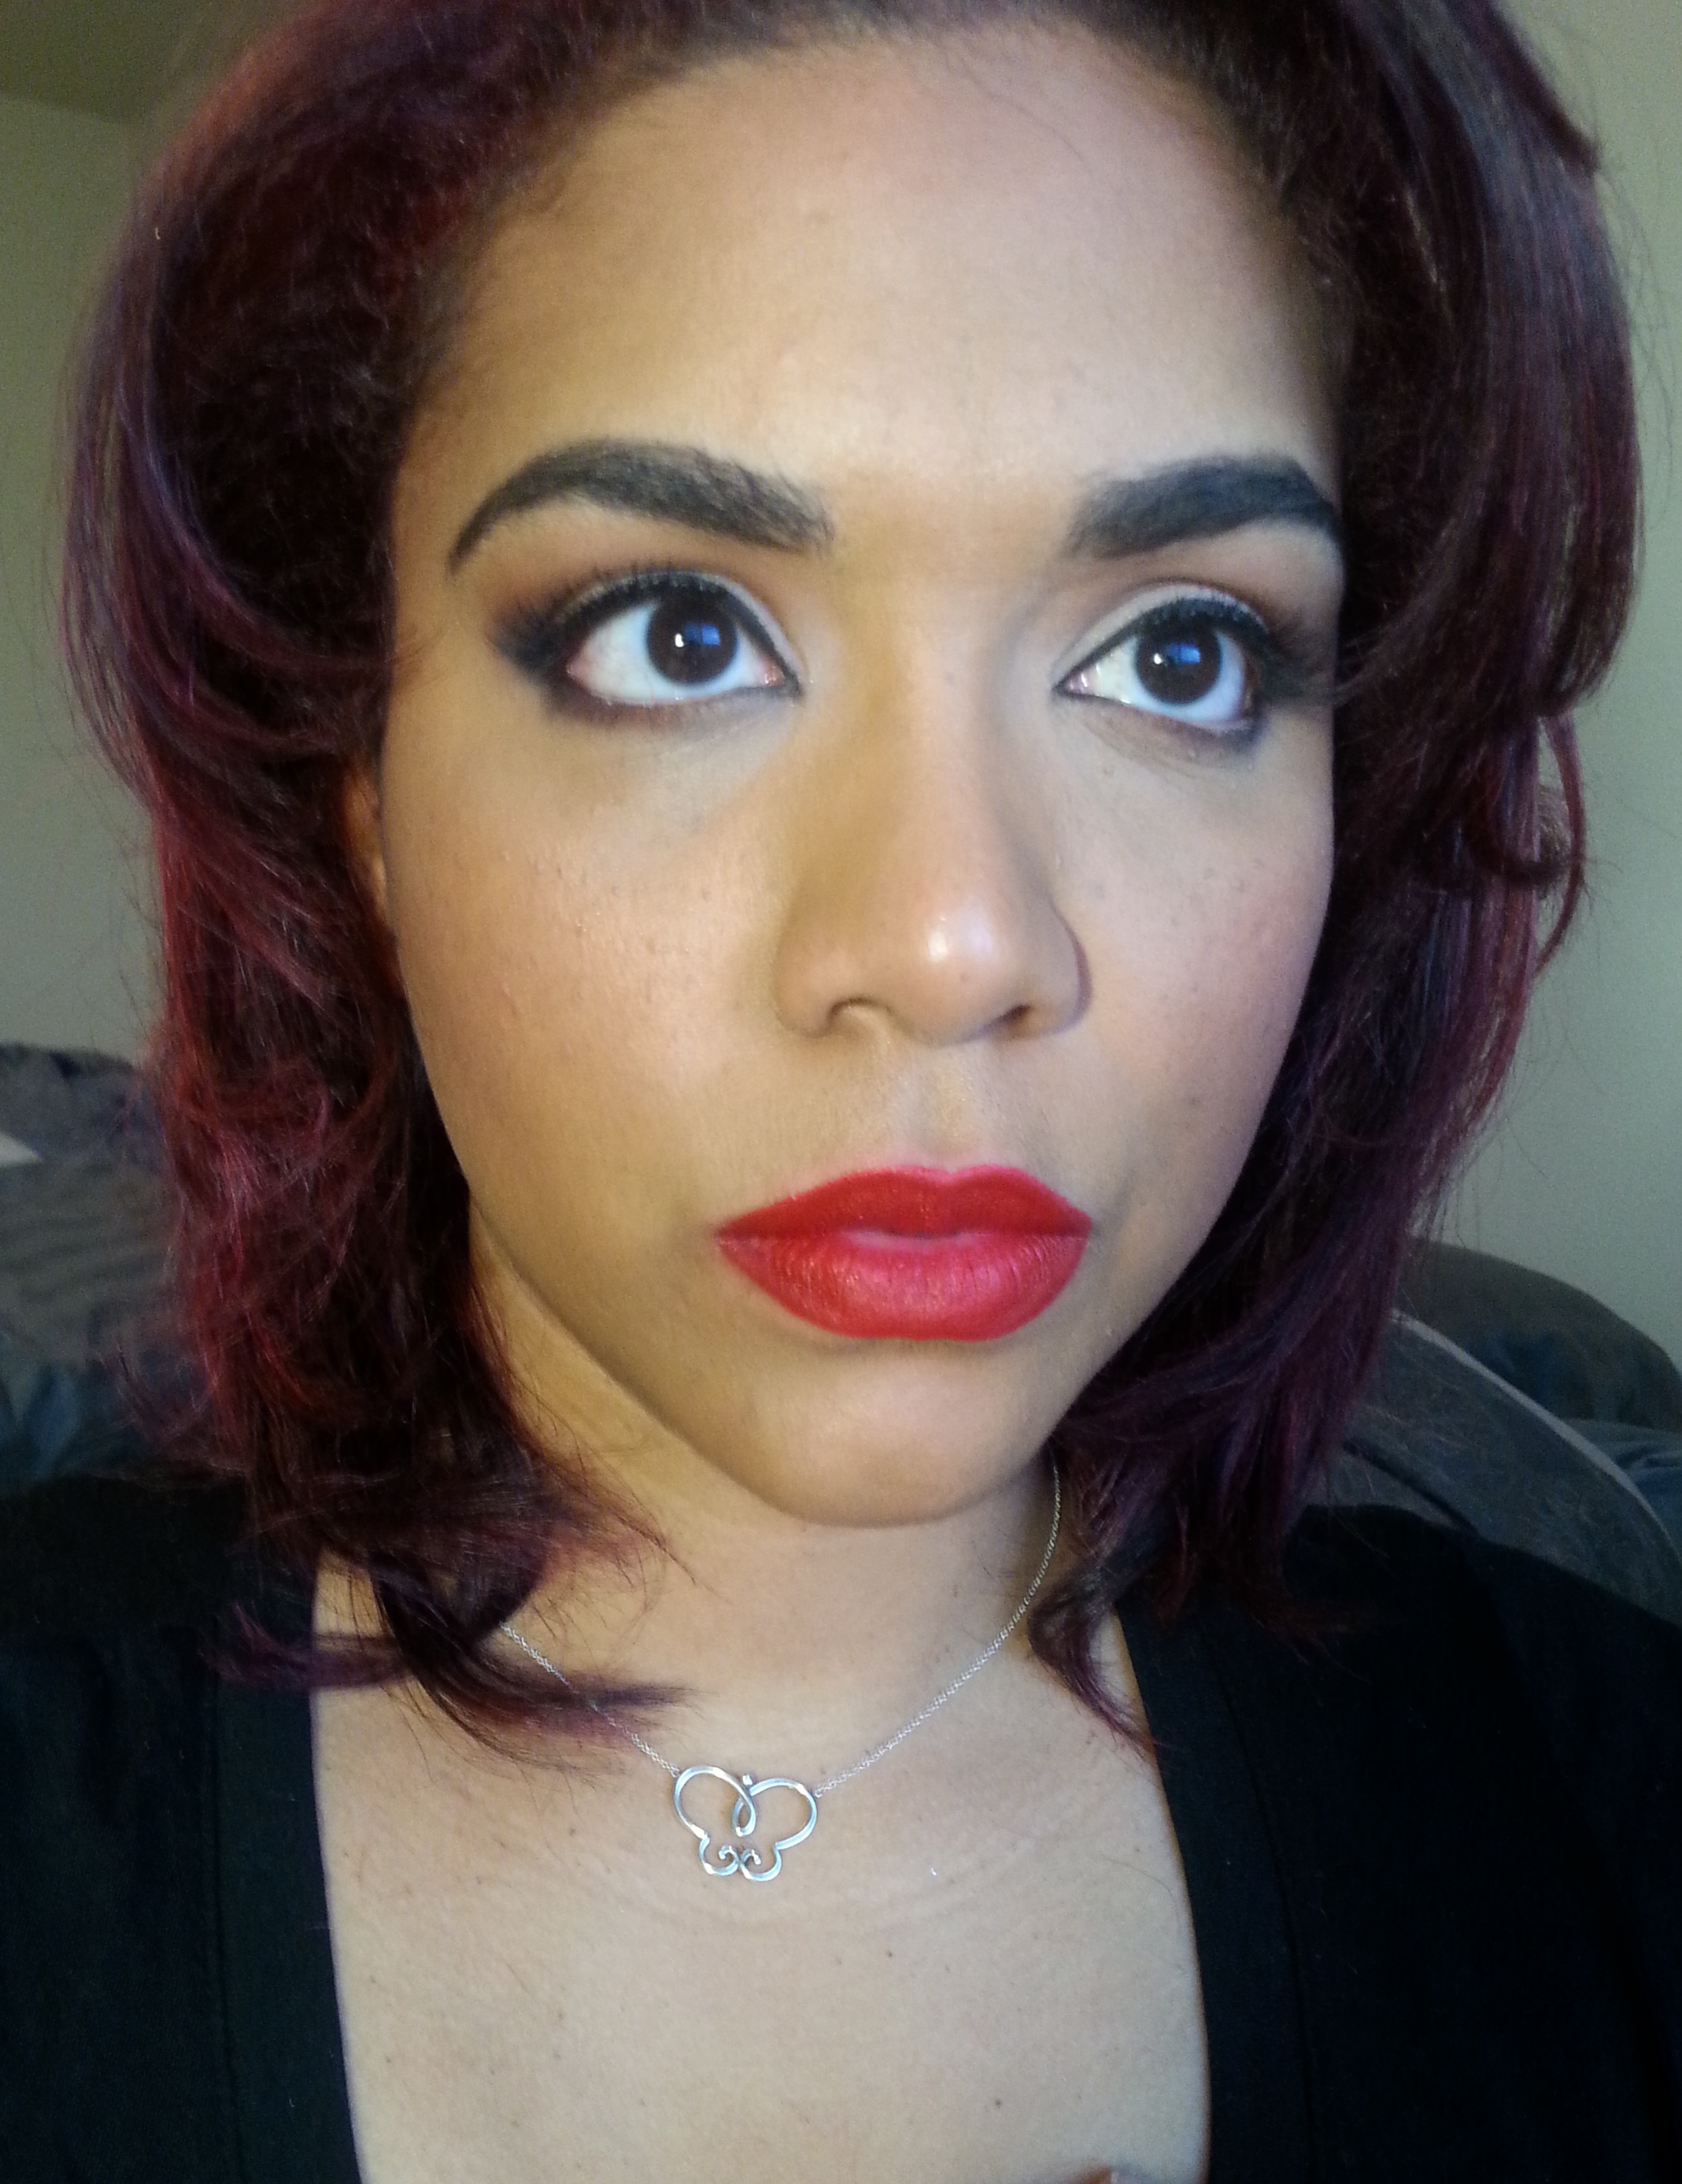
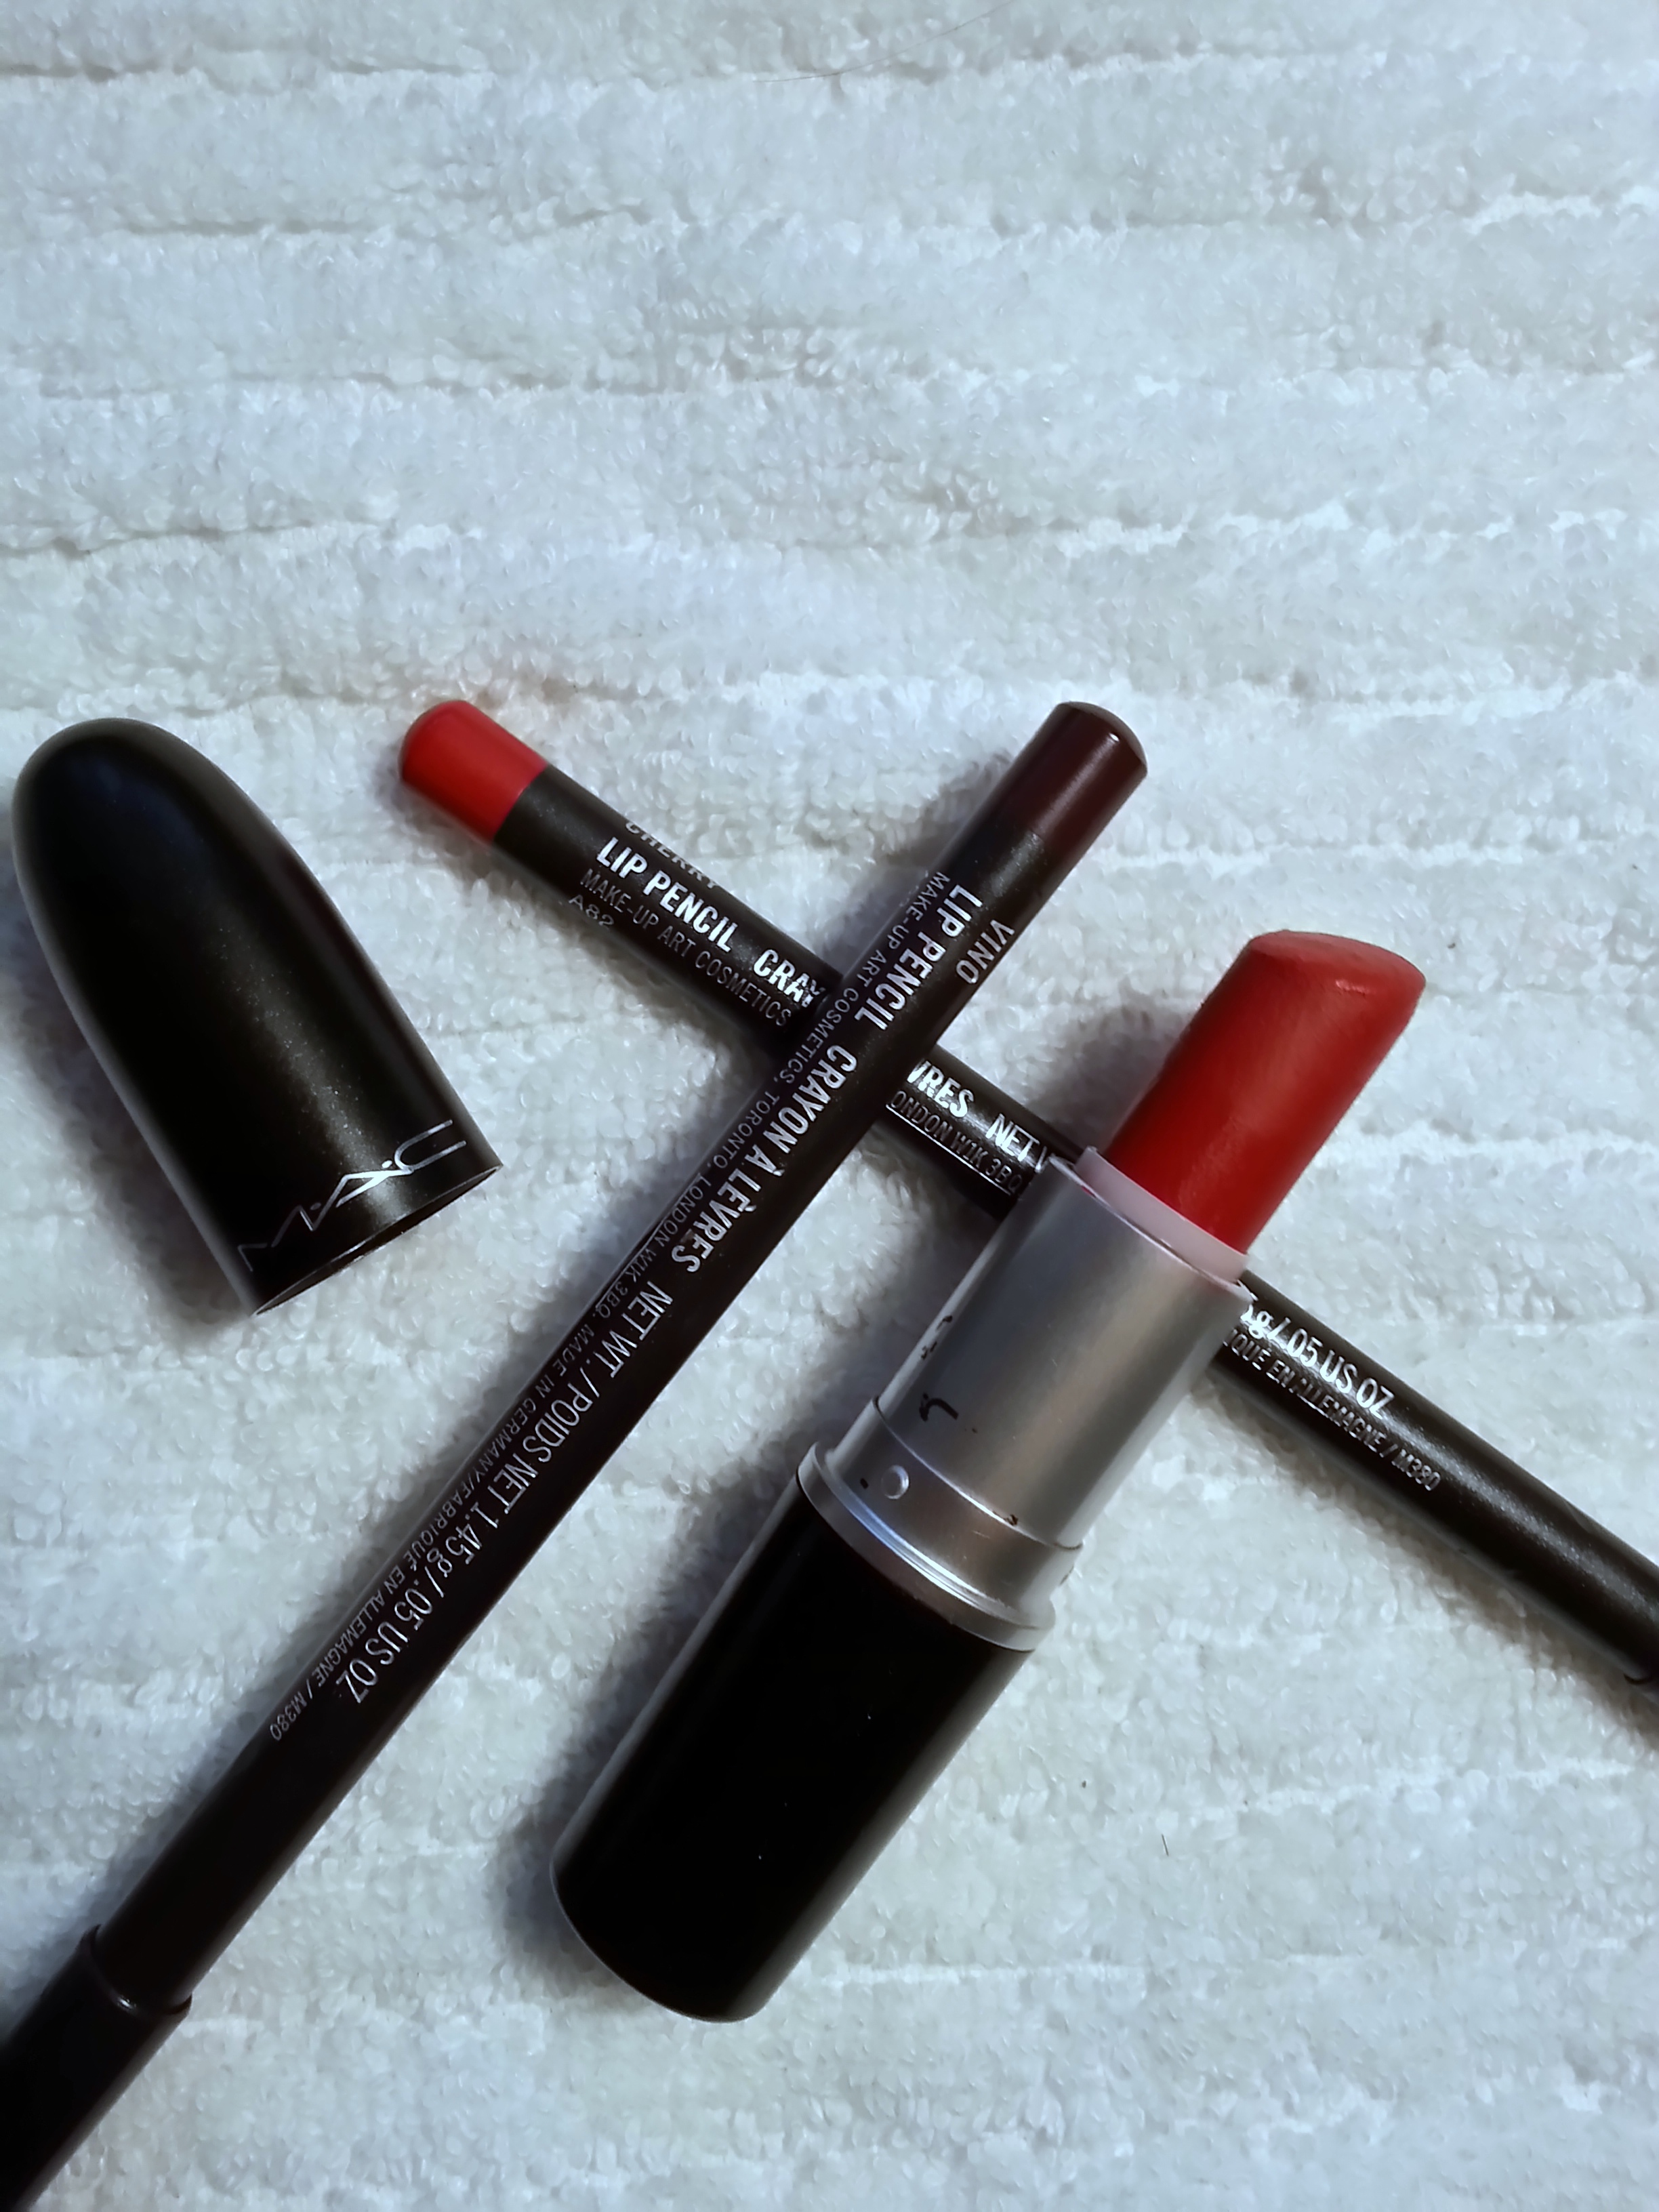
The Classic Red Lip works in many situations: (All MAC)
I lined and filled my lips with Cherry liner and topped that with Ruby Woo. For a little fun apply Vino to the outer corners of your lips for depth.

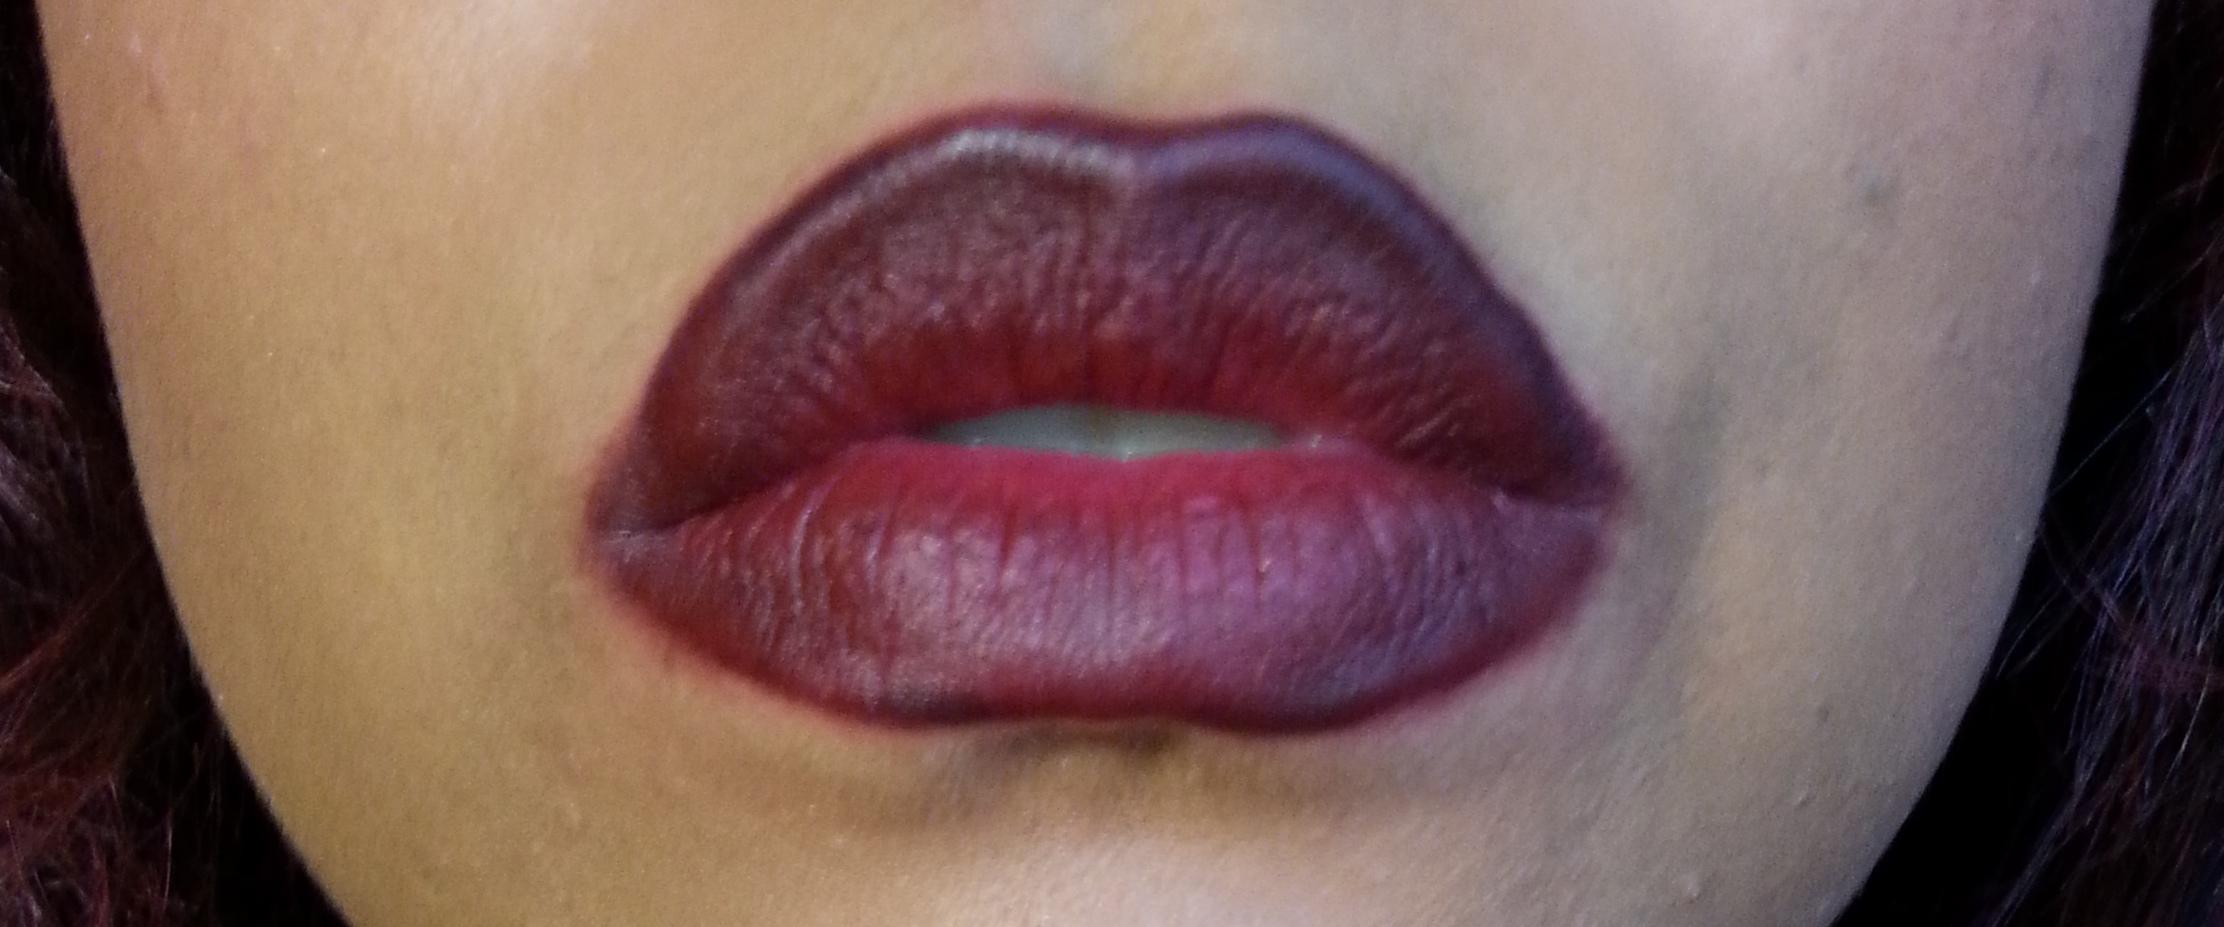
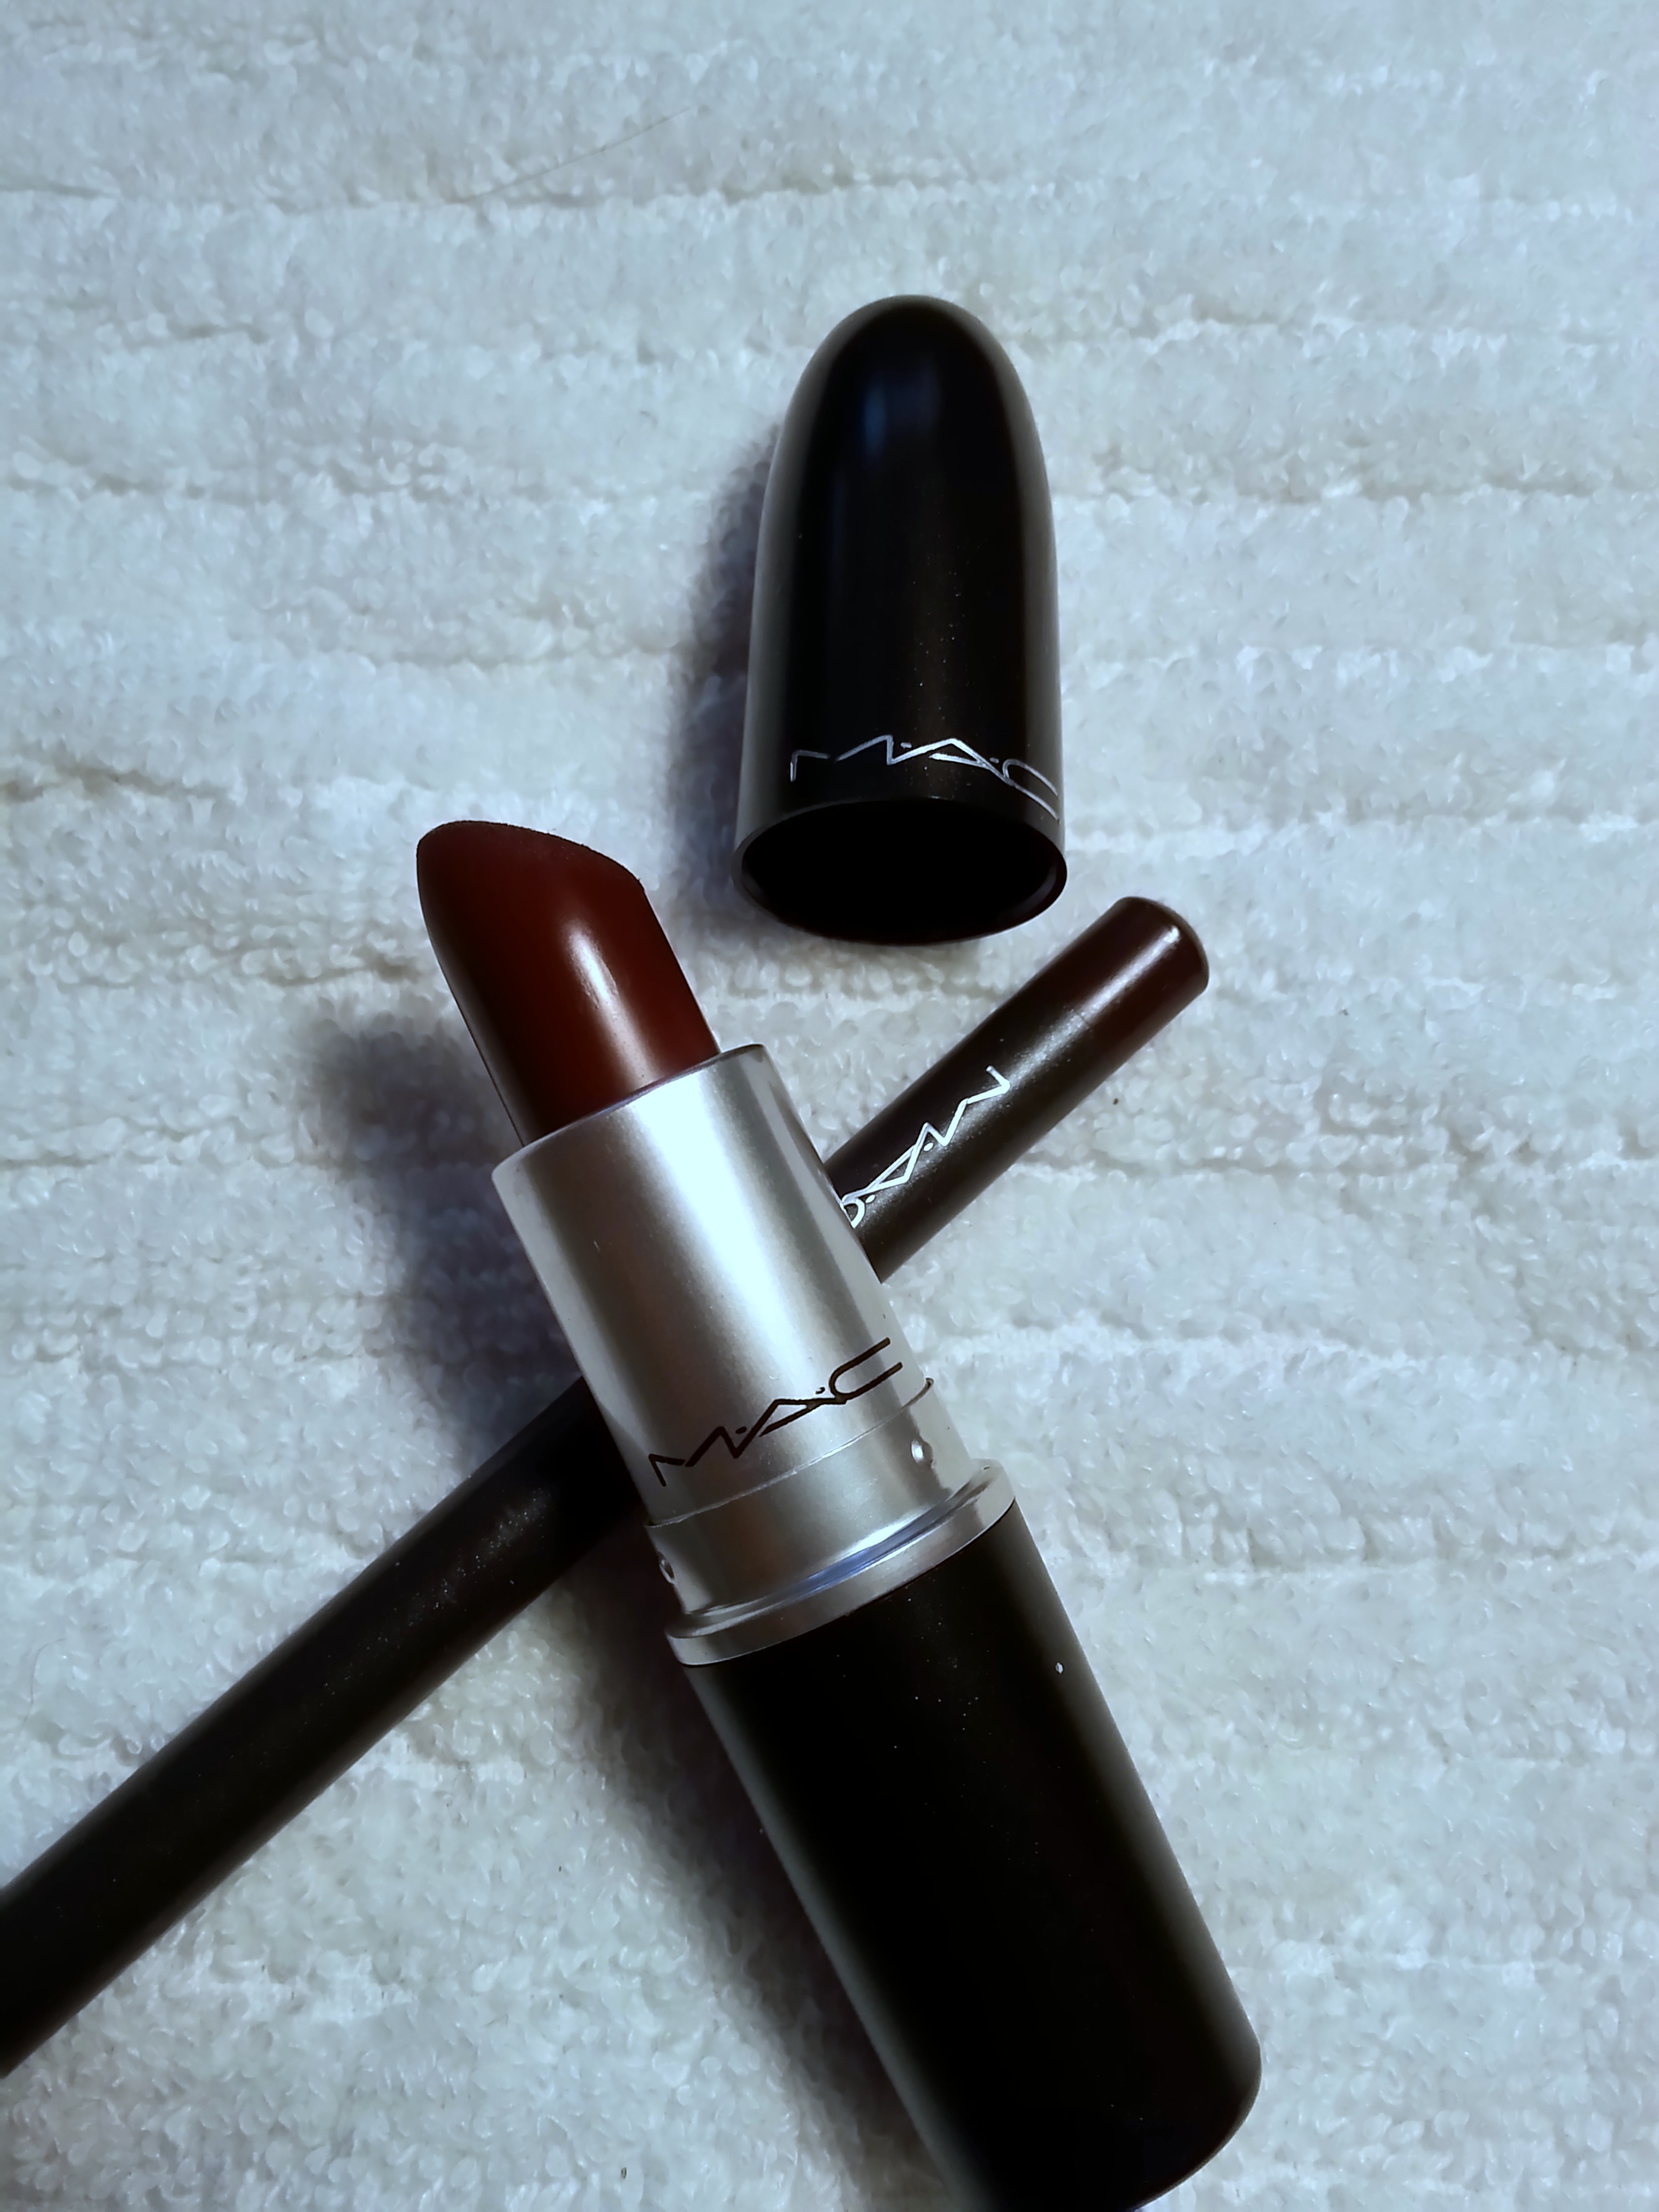
The final lip look is a deep berry color: (All MAC)
I lined my lips with Vino liner and used my finger to blend in Sin lipstick.

* Note, I typically wear mascara, but I was watching the Mindy Project while I was working on this, and got distracted -eb*

You must be logged in to post a comment.